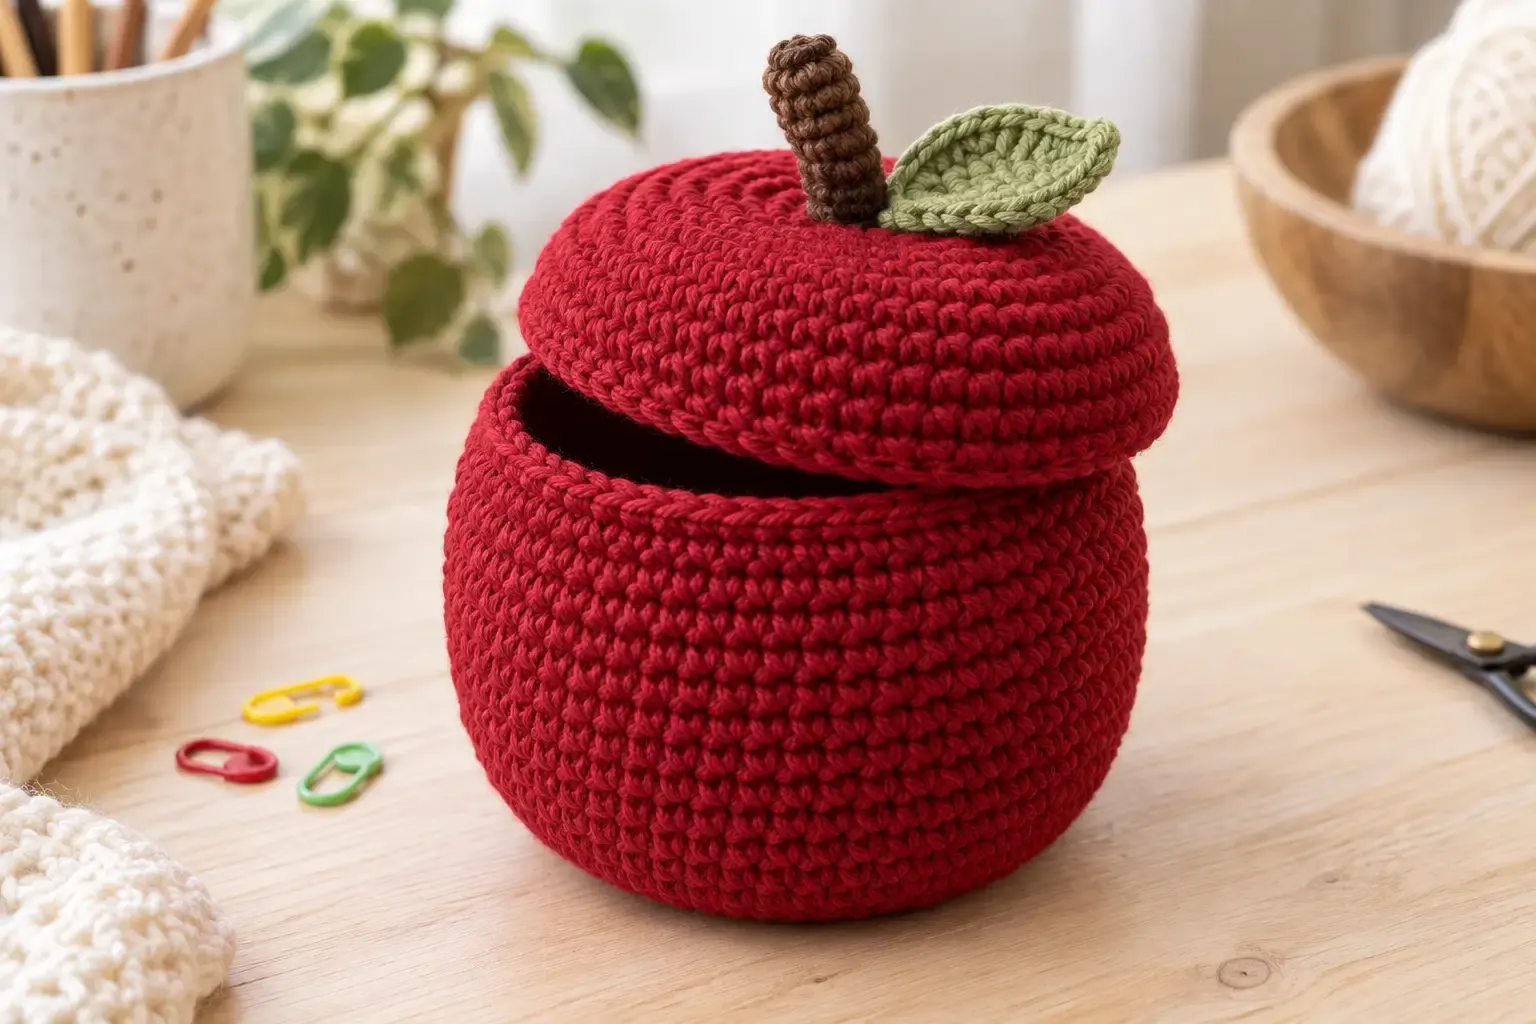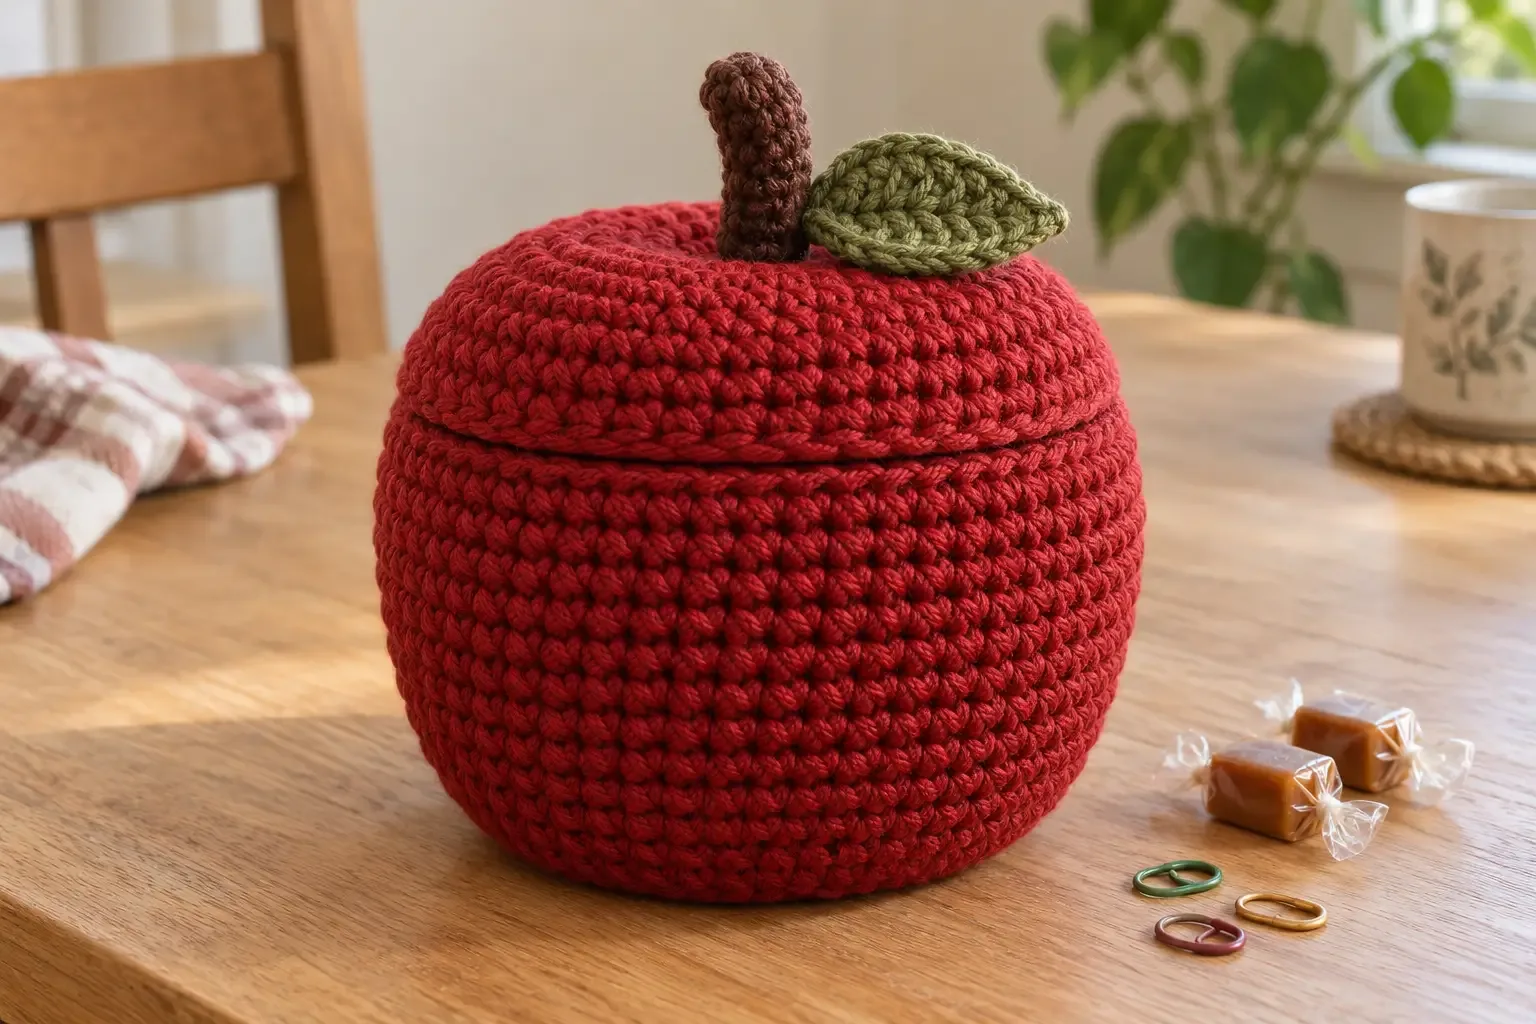
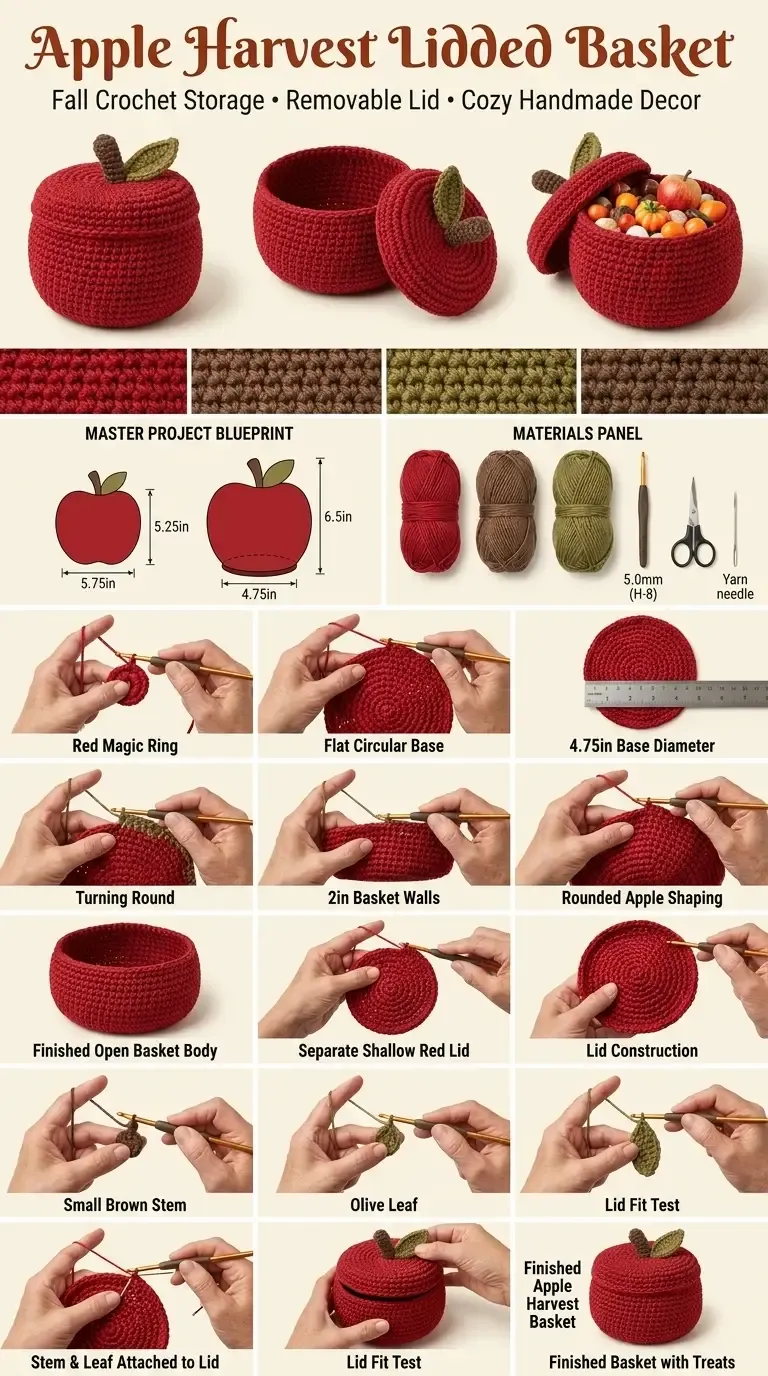
This apple-shaped basket is a cheerful place for wrapped treats, stitch markers, or other small treasures. The basket body begins as a flat circle, gains gentle fullness through the middle, and narrows at the top so a shallow removable lid rests neatly over the opening.
About this pattern
The Apple Harvest Lidded Basket is worked in joined single-crochet rounds with rich apple-red yarn. Eight increase rounds create a flat base of 48 stitches, one back-loop-only round turns the fabric upward, and a single increase and decrease sequence gives the body its gentle apple fullness. The opening narrows to 42 stitches; a separate 48-stitch lid overlaps that neck and is finished with a small brown stem and olive leaf.
US crochet terminology is used throughout. The basket is decorative storage for dry, lightweight objects and is not stuffed.
Materials
- #4 medium-weight cotton-blend yarn: approximately 170 yd (155 m) rich warm apple red
- Small amounts of medium brown yarn for the stem and muted olive-green yarn for the leaf
- 5.0 mm (H-8) crochet hook
- Tapestry needle, scissors, and stitch marker
- Optional small bowl for shaping the finished basket
Finished size and gauge
The basket body measures approximately 5.75 in (14.5 cm) wide at its fullest point × 5.25 in (13.5 cm) tall. Closed with the stem, it is about 6.5 in (16.5 cm) tall. The flat base is approximately 4.75 in (12 cm) in diameter. Aim for about 14 sc and 15 rounds per 4 in (10 cm); a firm fabric helps the basket and lid hold their shape.
Abbreviations
- ch — chain
- sc — single crochet
- BLO — back loop only
- sl st — slip stitch
- st(s) — stitch(es)
- inc — 2 sc in the same stitch
- sc2tog — single crochet two stitches together
Pattern notes
- Work in joined rounds. Ch 1 does not count as a stitch; join with a slip stitch to the first sc.
- Move the stitch marker to the first stitch after every join.
- The body begins with 48 stitches, increases to 54 for fullness, then decreases to a 42-stitch opening. Do not add increases elsewhere.
- Change color only for the stem and leaf; the basket and lid remain apple red for a coordinated finish.
- Check the lid fit before sewing on the stem so you can adjust the brim while it is still easy to handle.
Instructions
Apple basket body
With apple-red yarn, make a magic ring. Alternatively, ch 2 and work Round 1 into the second chain.
- Round 1: Ch 1, work 6 sc in the ring — 6 sts. Join.
- Round 2: Ch 1, inc in each stitch around — 12 sts. Join.
- Round 3: Ch 1, sc in the next st, inc in the next st around — 18 sts. Join.
- Round 4: Ch 1, sc in the next 2 sts, inc in the next st around — 24 sts. Join.
- Round 5: Ch 1, sc in the next 3 sts, inc in the next st around — 30 sts. Join.
- Round 6: Ch 1, sc in the next 4 sts, inc in the next st around — 36 sts. Join.
- Round 7: Ch 1, sc in the next 5 sts, inc in the next st around — 42 sts. Join.
- Round 8: Ch 1, sc in the next 6 sts, inc in the next st around — 48 sts. Join.
Lay the circle flat. It should measure close to 4¾ inches and lie smooth before you begin the sides.
- Round 9 (turning round): Ch 1, sc in the BLO of every stitch around — 48 sts. Join. This creates the base-to-wall corner.
- Rounds 10–16: Ch 1, sc in every stitch around — 48 sts. Join after each round.
- Round 17 (fullness increase): Ch 1, sc in the next 7 sts, inc in the next st around — 54 sts. Join.
- Rounds 18–20: Ch 1, sc in every stitch around — 54 sts. Join after each round.
- Round 21 (fullness decrease): Ch 1, sc in the next 7 sts, sc2tog around — 48 sts. Join.
- Rounds 22–24: Ch 1, sc in every stitch around — 48 sts. Join after each round.
- Round 25 (neck decrease): Ch 1, sc in the next 5 sts, sc2tog around — 42 sts. Join.
- Rounds 26–27: Ch 1, sc in every stitch around — 42 sts. Join after each round. Fasten off and weave in the end.
Removable lid
With apple-red yarn, make a magic ring.
- Round 1: Ch 1, work 6 sc in the ring — 6 sts. Join.
- Round 2: Ch 1, inc in each stitch around — 12 sts. Join.
- Round 3: Ch 1, sc in the next st, inc in the next st around — 18 sts. Join.
- Round 4: Ch 1, sc in the next 2 sts, inc in the next st around — 24 sts. Join.
- Round 5: Ch 1, sc in the next 3 sts, inc in the next st around — 30 sts. Join.
- Round 6: Ch 1, sc in the next 4 sts, inc in the next st around — 36 sts. Join.
- Round 7: Ch 1, sc in the next 5 sts, inc in the next st around — 42 sts. Join.
- Round 8: Ch 1, sc in the next 6 sts, inc in the next st around — 48 sts. Join.
- Rounds 9–11: Ch 1, sc in every stitch around — 48 sts. Join after each round.
- Round 12 (lid edge): Ch 1, sc in every stitch around — 48 sts. Join, fasten off, and leave a 10-inch sewing tail.
Place the lid over the 42-stitch opening. Its 48-stitch edge should overlap the neck evenly without stretching. If it feels loose, work one additional lid round with the 5.0 mm hook; if it is tight, lightly block the lid over the basket.
Brown stem
With brown yarn, ch 8.
- Row 1: Sc in the second chain from the hook and across — 7 sc. Turn.
- Rows 2–6: Ch 1, sc across — 7 sc. Turn after each row.
Fasten off, leaving a long tail. Roll the strip into a narrow tube, add no stuffing, and sew the long edge closed. Stitch the stem upright through the center of the lid using several underside stitches.
Olive leaf
With olive-green yarn, ch 8.
- Row 1: Starting in the second chain from the hook, work sl st, sc, hdc, dc, dc, hdc, sc — 7 stitches. Turn.
- Row 2: Ch 1, work sc, hdc, dc, dc, hdc, sc, sl st across — 7 stitches. Fasten off, leaving a sewing tail.
Pinch the narrow end and sew the leaf beside the stem on the lid. Angle the tip toward the outer edge of the apple.
Assembly and finishing
- Check the lid once more, then sew the stem and leaf securely to its center. Keep the lid removable; do not stitch it to the basket body.
- Weave in every end on the inside. Shape the body over a bowl close to the 4¾-inch base diameter and let it dry completely.
- Place the lid on the 42-stitch opening and check that it sits level. The 48-stitch lid edge should cover the neck while leaving a small lift-off gap.
- Use the finished basket for wrapped sweets, stitch markers, jewelry, keys, or other small dry items.
Helpful tips and customization
- Verify the base sequence: 6, 12, 18, 24, 30, 36, 42, 48. A flat circle confirms the increases are evenly spaced.
- The body sequence 48 → 54 → 48 → 42 creates fullness without distorting the opening. Keep these counts if you want the lid to fit as written.
- Add one plain 48-stitch round for a slightly taller body, but do not alter the final 42-stitch neck rounds.
- Use green, gold, or deep purple yarn for the leaf to create different harvest colorways.
This pattern is for personal use. You may sell finished baskets made from it, but please do not redistribute, resell, or repost the written pattern or photographs.
Enjoy your apple harvest basket—a practical little container with a removable lid and a sweet seasonal silhouette.
Helpful questions
How does the lid fit the opening?
The body finishes at 42 stitches and the lid brim finishes at 48 stitches. That small overlap lets the lid sit over the opening while remaining easy to lift.
Can I make the apple basket taller?
Add plain 48-stitch rounds before the final decrease to 42 stitches. Keep the 42-stitch opening and the lid measurements unchanged for a reliable fit.
Does this pattern use stuffing?
No. The basket is an open, usable container with a removable lid and no stuffing, zipper, handle, or face.