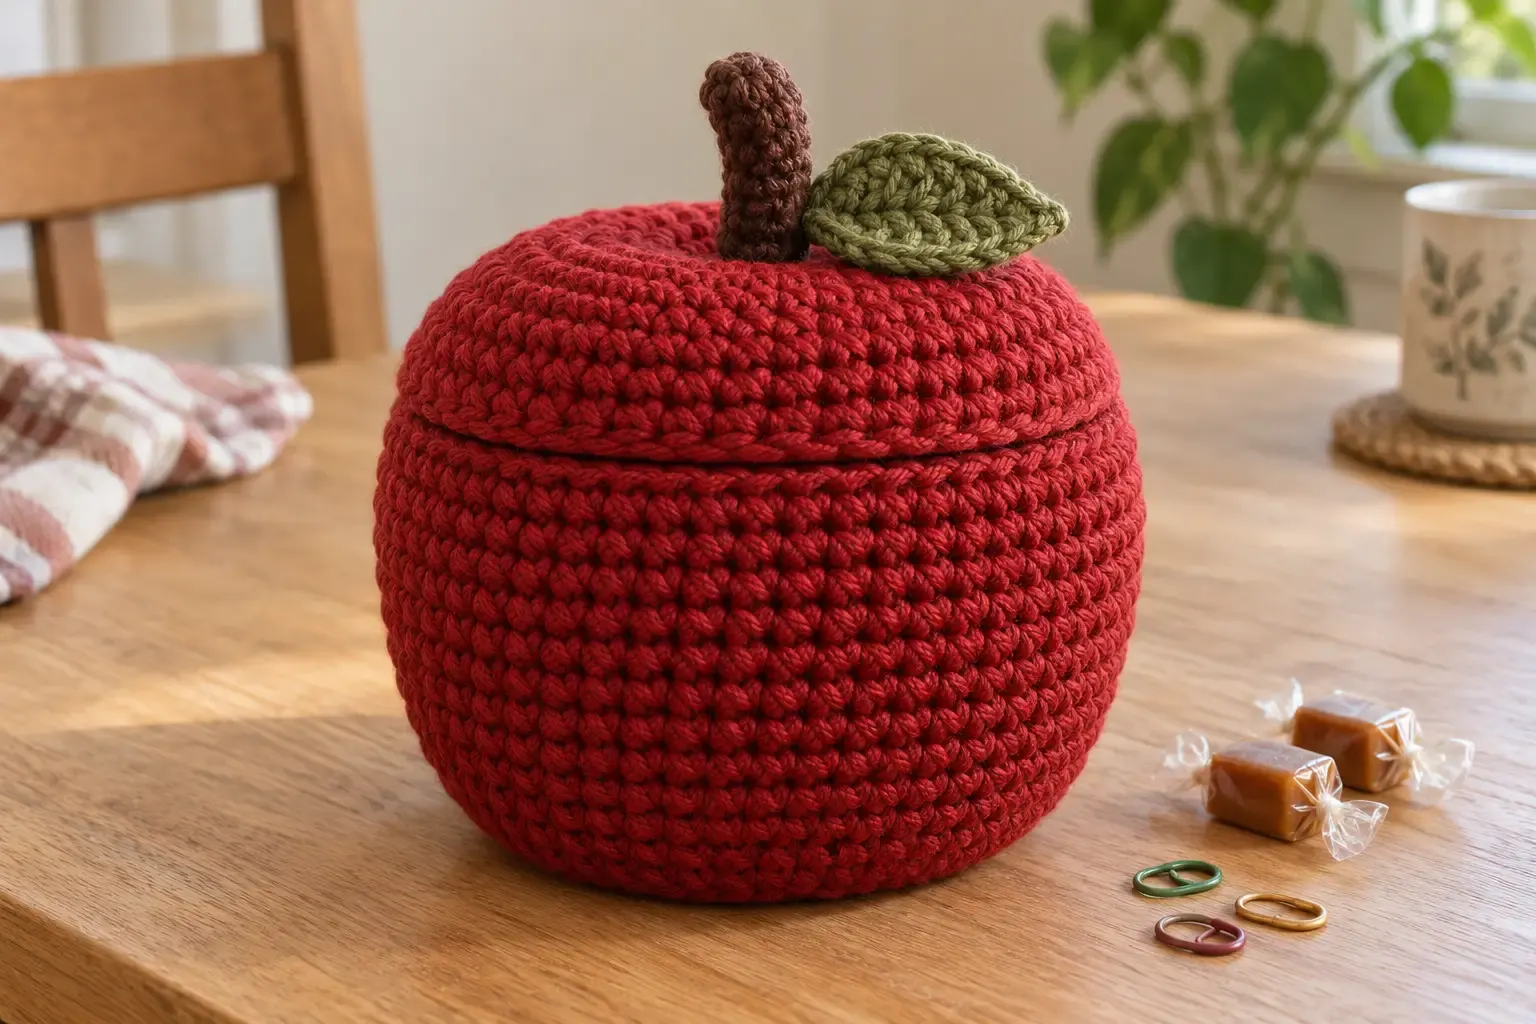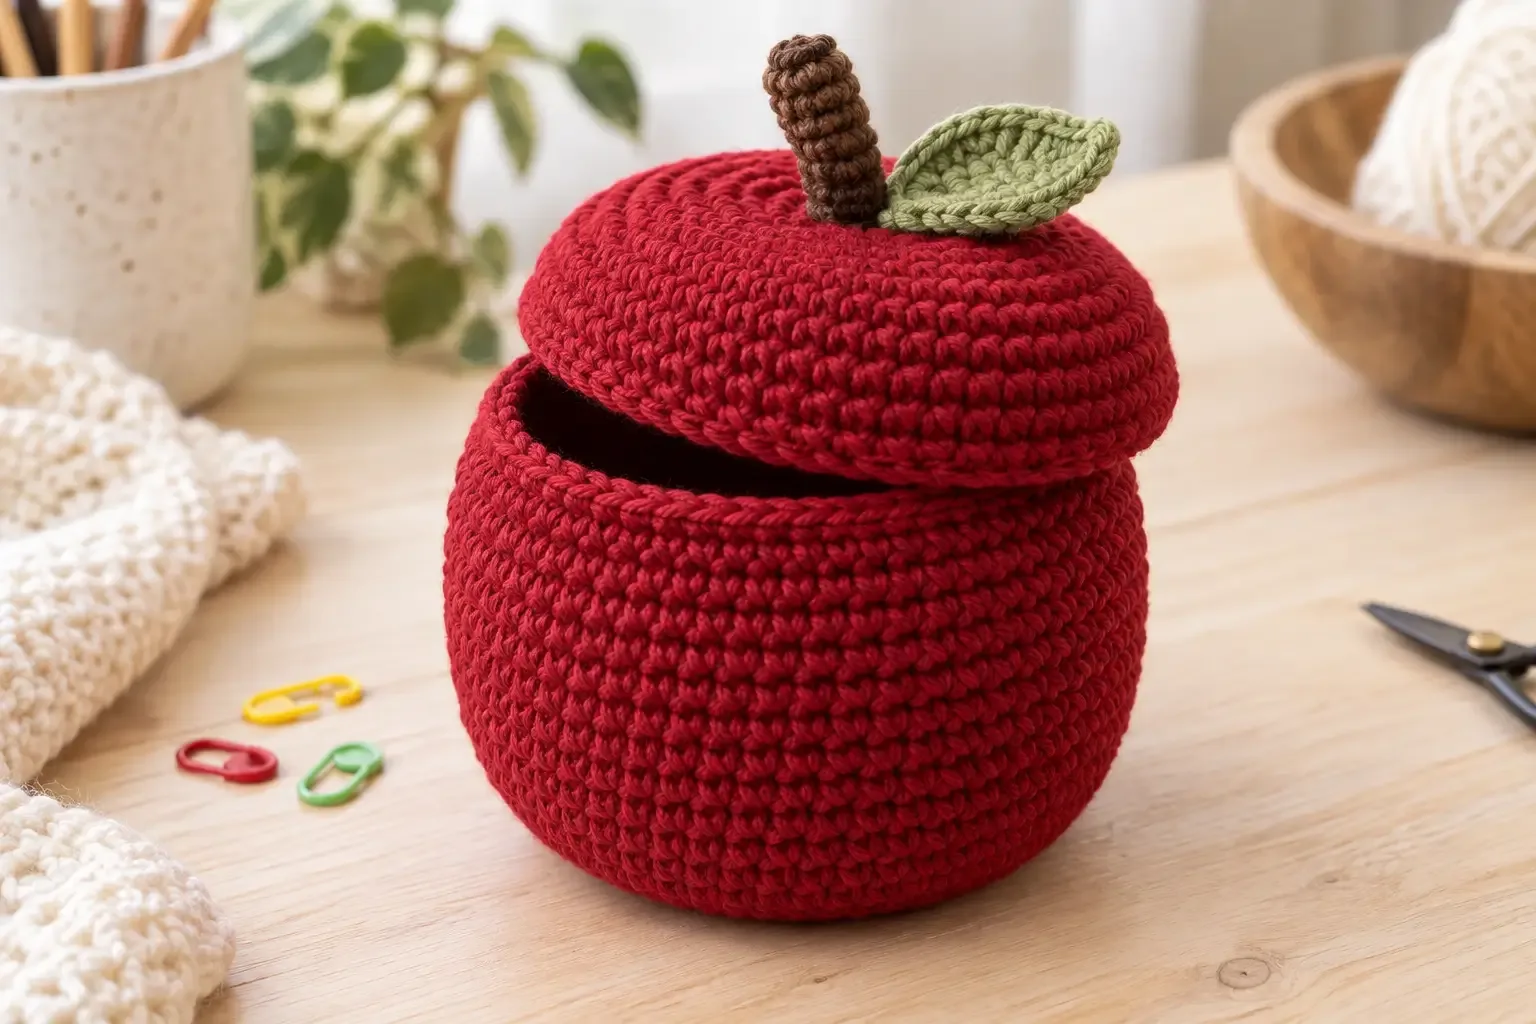
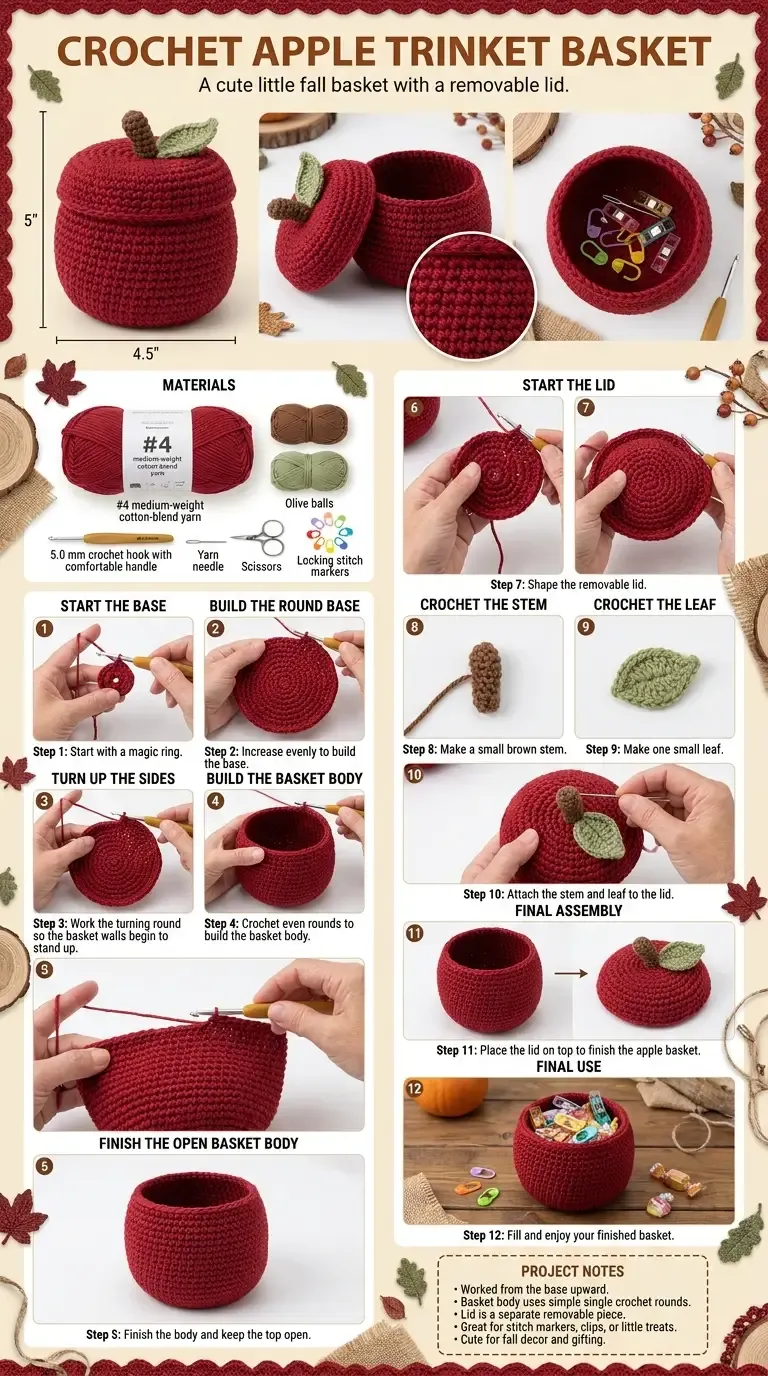
This apple trinket basket is a useful little container for stitch markers, clips, wrapped sweets, or jewelry. The basket body is worked upward from a firm circular base, then paired with a separate domed lid and simple stem-and-leaf details.
About this pattern
This apple-shaped trinket basket is worked in three parts. A tan or red round base grows to the desired diameter, then several even single-crochet rounds turn upward into the basket walls. A second circle becomes the brown-red lid, with a final increase round creating a small overhanging brim. A short stem and one leaf complete the apple silhouette.
The pattern is an original HookElla interpretation of the supplied finished and construction images. It uses US crochet terminology and has not been physically tested, so check the opening and lid fit as you work.
Materials
- Approximately 150 yd (137 m) medium-weight category 4 cotton-blend yarn in apple red
- Small amounts of brown yarn for the stem and olive-green yarn for the leaf
- 5 mm (H-8) crochet hook
- Tapestry needle, scissors, stitch marker, and optional felt for the base
Finished size and gauge
The finished basket is approximately 4.5 in (11.5 cm) wide and 4 in (10 cm) tall, or about 5 in (12.5 cm) including the stem. Gauge is flexible for a small container; aim for approximately 4 single crochet stitches and 4 rounds per inch (16 stitches and 16 rounds per 4 in / 10 cm). Keep the body and lid at the same gauge.
Abbreviations
- ch — chain
- sc — single crochet
- sl st — slip stitch
- st(s) — stitch(es)
- inc — 2 sc in the same stitch
Pattern notes
- Join every round with a slip stitch to the first sc; the ch 1 does not count as a stitch.
- Mark the first stitch of each round and move the marker as you join.
- Work increases evenly so the base and lid stay flat.
- The body is worked in red, while the lid may be red or brown-red for contrast.
Instructions
Basket base and body
With apple-red yarn, make a magic ring. Alternatively, ch 2 and work Round 1 into the second chain.
- Round 1: 6 sc in the ring — 6 sts. Join.
- Round 2: Ch 1, inc in each stitch around — 12 sts. Join.
- Round 3: Ch 1, sc in the next st, inc in the next st around — 18 sts. Join.
- Round 4: Ch 1, sc in the next 2 sts, inc in the next st around — 24 sts. Join.
- Round 5: Ch 1, sc in the next 3 sts, inc in the next st around — 30 sts. Join.
- Round 6: Ch 1, sc in the next 4 sts, inc in the next st around — 36 sts. Join.
- Round 7: Ch 1, sc in the next 5 sts, inc in the next st around — 42 sts. Join.
- Round 8: Ch 1, sc in the next 6 sts, inc in the next st around — 48 sts. Join.
- Round 9: Ch 1, sc around — 48 sts. Join. This turning round establishes the basket wall.
- Rounds 10–20: Ch 1, sc around — 48 sts. Join after every round.
- Round 21: Ch 1, sc around — 48 sts. Join, fasten off, and weave in the end.
The base should measure about 4.5 in (11.5 cm) across and the body about 3.5–4 in (9–10 cm) tall. Add or remove plain body rounds for height, but keep the lid diameter matched to the opening.
Removable lid
With red or brown-red yarn, make a magic ring.
- Round 1: 6 sc in the ring — 6 sts. Join.
- Round 2: Inc in each stitch around — 12 sts. Join.
- Round 3: Sc in the next st, inc in the next st around — 18 sts. Join.
- Round 4: Sc in the next 2 sts, inc in the next st around — 24 sts. Join.
- Round 5: Sc in the next 3 sts, inc in the next st around — 30 sts. Join.
- Round 6: Sc in the next 4 sts, inc in the next st around — 36 sts. Join.
- Round 7: Sc in the next 5 sts, inc in the next st around — 42 sts. Join.
- Round 8: Sc in the next 6 sts, inc in the next st around — 48 sts. Join.
- Rounds 9–11: Ch 1, sc around — 48 sts. Join. These even rounds give the lid its shallow dome.
- Round 12 (brim): Ch 1, sc in the next 7 sts, inc in the next st around — 54 sts. Join.
- Round 13: Ch 1, sc around — 54 sts. Join, fasten off, and leave a sewing tail.
Place the lid over the basket. The 54-stitch brim should overlap the 48-stitch body rim slightly while still lifting off easily. If it is tight, block the lid over the basket opening before attaching the stem.
Stem
With brown yarn, ch 8.
- Row 1: Sc in the second chain from the hook and across — 7 sc.
- Rows 2–6: Ch 1, sc across — 7 sc.
Fasten off, leaving a long tail. Roll the strip into a narrow tube, add a small pinch of fiberfill, and stitch the long edge closed. Sew the stem securely to the center of the lid.
Leaf
With olive-green yarn, ch 7. Starting in the second chain from the hook, work sl st, sc, hdc, dc, hdc, sc along one side. Ch 1, then work the same sequence back along the opposite side of the chain. Slip stitch to the first stitch, fasten off, and sew the leaf beside the stem.
Assembly and finishing
Weave in the ends on the inside of the basket and lid. Check that the lid sits evenly and that the stem does not prevent it from opening. If desired, place a felt circle inside the base for stability. Use the basket for dry, lightweight items and follow the yarn label for spot cleaning.
Helpful tips
- Count the base after every increase round: 6, 12, 18, 24, 30, 36, 42, then 48 stitches.
- Keep the body sides upright by maintaining even tension after the turning round.
- If the lid ripples, reduce tension slightly or lightly block it over the basket opening.
- For a gift-ready finish, coordinate the leaf color with other fall crochet pieces such as the Crochet Maple Leaf Table Mat.
Helpful questions
What can I keep in this apple basket?
It is sized for lightweight dry items such as stitch markers, clips, wrapped candies, jewelry, or small notions. Avoid wet contents and food that will be eaten directly from the yarn.
Can I make the apple basket larger?
Yes. Add one or two increase rounds to both the body base and lid, then add matching plain rounds. Measure the lid against the opening before finishing the brim.
Is the lid attached?
No. The lid is a separate removable piece so the basket can stay open while you work or store items.
How do I keep the basket standing firmly?
Use a tight single-crochet fabric and a hook that gives firm stitches. A felt circle cut slightly smaller than the base can be placed inside for extra support.