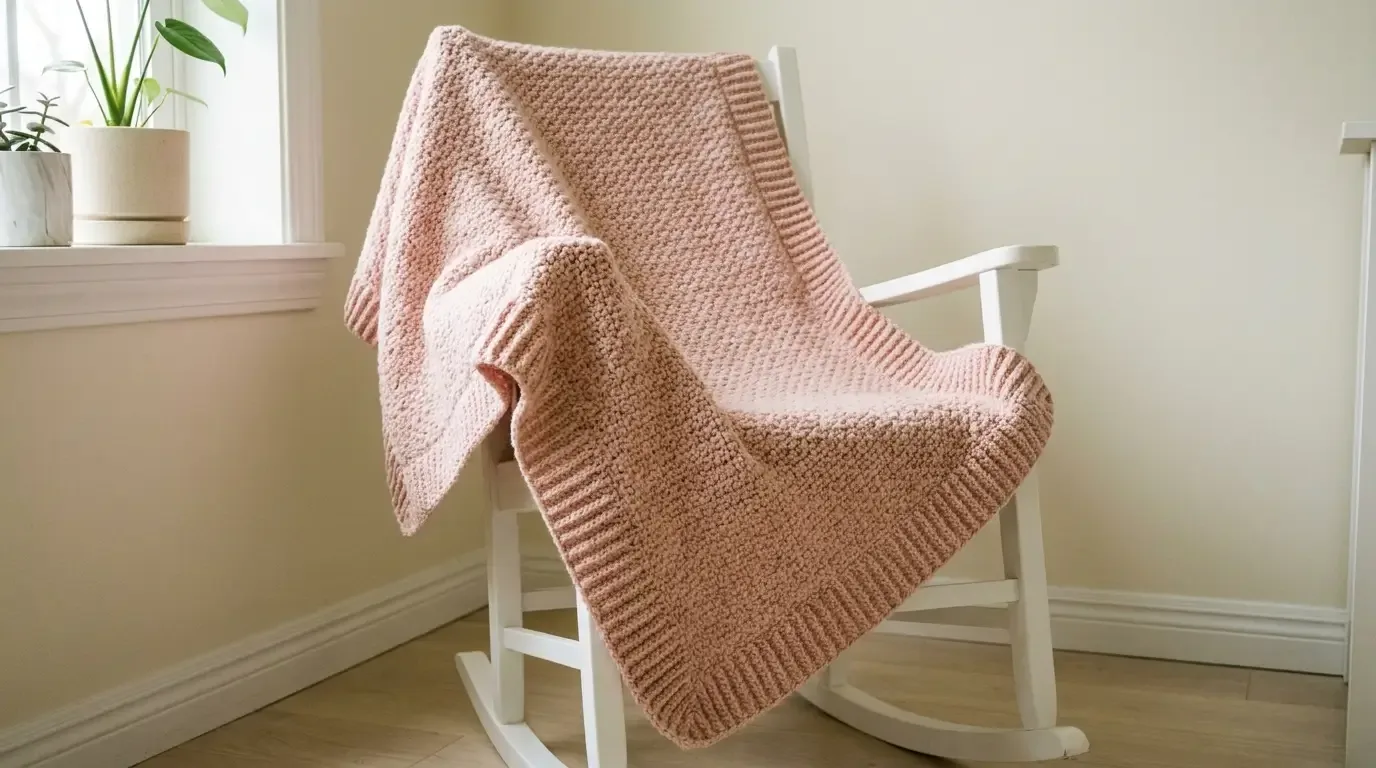
Alternating single crochet and double crochet make a dense, softly pebbled fabric that looks good on both sides. A broad ridged border frames this simple 30 × 32-inch blanket in a gentle blush color.
A softly textured blanket for everyday cuddles
The Blush Pebble Baby Blanket is a straightforward rectangle with a little extra dimension. Each row alternates single crochet and double crochet; on the next row, those stitches switch places. The offset texture is pleasantly nubby, dense without being stiff, and attractive on both sides. A wide band of back-loop half double crochet finishes the edges with an easy-to-count series of ridges.
The blanket is worked flat in one piece, then edged all the way around. The directions use US crochet terms and are suitable for a confident beginner who can identify stitch tops and keep a steady edge count.
Finished size and gauge
The target finished size is approximately 30 × 32 in (76 × 81 cm). The center body is about 26 × 28¼ in (66 × 72 cm) before the border; the border adds close to 2 inches on each side. These are approximate dimensions and will vary with yarn, hook, and personal tension.
Gauge: 12 stitches × 14 rows = 4 in (10 cm) in the Pebble Stitch, measured after washing and drying your swatch as you plan to care for the blanket. At this gauge, 78 stitches make a 26-inch body width and 99 rows make a 28¼-inch body length. If your swatch differs, adjust the hook until the fabric feels soft but stable. You can use the Yarnivo gauge calculator to translate your swatch measurements into project dimensions; the written pattern counts below are still the counts for this size.
Materials
- Approximately 1,000–1,200 yd (914–1,097 m) medium / worsted #4 yarn; four skeins of roughly 250–300 yd each are a practical starting estimate
- 7.0 mm (K-10.5) crochet hook, or the size that gives the stated gauge and a fabric you like
- Tapestry needle, scissors, and measuring tape
- Removable stitch markers for the four border corners
Choose a soft, washable yarn suitable for frequent laundering. A smooth acrylic or acrylic blend shows the pebbled texture clearly and makes care straightforward. If the blanket is for a baby, follow the yarn label and the recipient’s care needs; do not leave a loose blanket with an unattended infant during sleep.
Abbreviations
- BLO — back loop only
- ch — chain
- dc — double crochet
- hdc — half double crochet
- rep — repeat
- RS — right side
- sc — single crochet
- sl st — slip stitch
- st(s) — stitch(es)
- WS — wrong side
Pebble Stitch
The stitch pattern alternates single crochet and double crochet. The next row reverses the stitch types over the row below, which offsets the small raised bumps.
To make an sc, insert the hook in the stitch, yarn over and pull up a loop, yarn over and draw through both loops. To make a dc, yarn over, insert the hook in the stitch, yarn over and pull up a loop, yarn over and draw through two loops, then yarn over and draw through the last two loops.
The turning chain is ch 1 and does not count as a stitch. Work the first stitch into the first stitch of the previous row—not into the turning chain. Keep both the first and last stitches visible so the side edges stay straight.
Blanket body
The pattern is written for one size. The foundation makes 78 working stitches.
With the 7 mm hook and blush yarn, ch 79 loosely.
Row 1 (RS): Sc in the second ch from the hook, dc in the next ch; repeat sc in the next ch, dc in the next ch across. 78 sts: 39 sc and 39 dc. Ch 1, turn.
Row 2 (WS): Dc in the first sc, sc in the next dc; repeat dc in the next sc, sc in the next dc across. 78 sts: 39 dc and 39 sc. Ch 1, turn.
Row 3: Sc in the first dc, dc in the next sc; repeat sc in the next dc, dc in the next sc across. 78 sts: 39 sc and 39 dc. Ch 1, turn.
Repeat Rows 2–3 49 times, for 99 rows total (Row 1 plus 49 repeats). End after a Row 3. The body should measure about 26 × 28¼ in (66 × 72 cm). Do not fasten off. Lay the blanket flat with the RS facing up and begin the border at the corner where the working yarn ends.
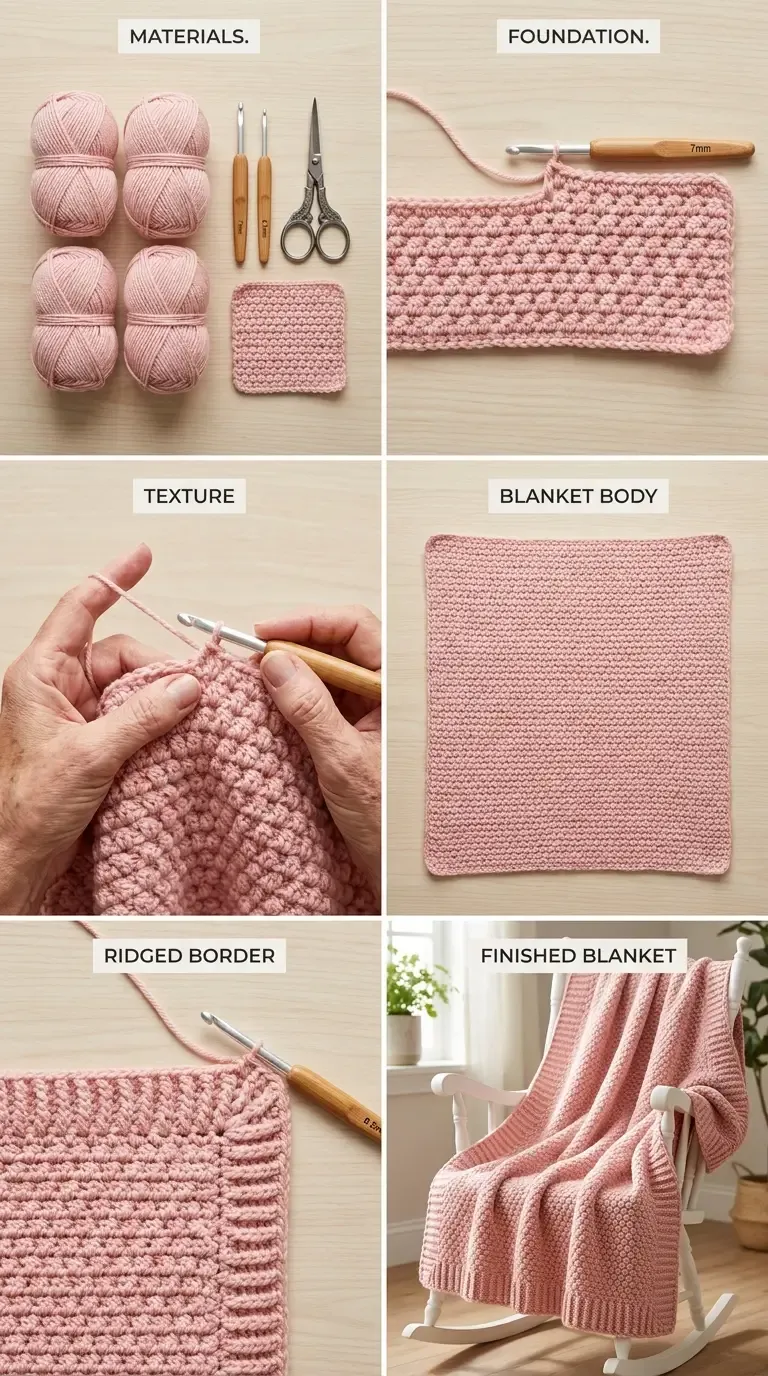
Use this image as a visual overview; follow the written counts and row sequence above.
Wide ridged border
The border is worked in continuous rounds around the rectangle. It begins with one single-crochet round to stabilize the raw edges, followed by eight half-double-crochet rounds worked in the back loop only. The ridges should run parallel to the blanket edge. Keep the corners marked and work the increases consistently so the border lies flat.
Setup round
With the RS facing and working yarn still attached, ch 1 (does not count). Sc evenly along the first side, work 3 sc in the corner, sc evenly along the next side, 3 sc in the next corner, and continue around in the same way. Along the row-end edges, work about one sc in the end of each body row; along the foundation and final-row edges, work one sc in each stitch. If the edge ripples, work fewer stitches; if it cups, work a few more, spacing any adjustment evenly. Work 3 sc in each corner. Join with a sl st to the first sc. Place a marker in the middle (second) sc of each 3-sc corner group. The border round count will vary with how many stitches are needed to travel evenly around the body.
Ridged rounds
Rounds 1–8: Ch 1 (does not count). Hdc in the BLO of each stitch until the marked middle stitch of the next corner; work 3 hdc in that marked stitch, move the marker to the middle hdc of this new group, and continue. Repeat at all four corners. Join with a sl st to the first hdc. Do not turn.
The ch-1 at the start of each round is not a stitch. On every round, the marked middle stitch is the corner increase point. Moving each marker into the middle of the new 3-hdc group keeps the rectangle square. After Round 8, fasten off with a long tail and weave it securely into the border.
The border should measure close to 2 inches from the body edge. If your hdc rounds are taller or shorter than the sample gauge, measure after Round 6 and stop when the border is approximately 2 inches deep, ending after a complete round. The finished size may vary slightly from 30 × 32 inches.
Finishing and care
Weave in all ends on the wrong side, threading each tail through several stitches in more than one direction. Lay the blanket flat and square the corners. If needed, gently wet-block to the target dimensions without stretching the border. Let it dry completely before use. Wash and dry according to the yarn label, reshaping it while damp.
Fit, customization, and troubleshooting
- For a different width: Keep an even number of working stitches so Row 1 ends with equal sc and dc counts. Chain one more than the desired working-stitch count. Swatch the stitch and use your measured gauge to choose a count near your target width. Changing width changes yarn use and does not automatically adapt the border.
- For a different length: Add or remove complete two-row repeats after Row 1, checking the measurement as you go. The written version has 99 rows (Row 1 plus 49 repeats of Rows 2–3).
- If the fabric feels too stiff: Try a larger hook or loosen your tension; if it is too loose and holey, try a smaller hook. Always wash the swatch before deciding.
- If the edge is wavy: Confirm that each body row has 78 stitches and that the turning chain has not been counted as a stitch. On the border, distribute edge stitches evenly and avoid adding extras at the corners beyond the marked 3-hdc increase.
- If the pebbles line up instead of offsetting: Check that each row alternates stitch types over the opposite stitch in the row below. Row 2 starts with dc; Row 3 starts with sc.
- If the border curls: Keep the hdc loops relaxed and check that each corner marker stays in the middle of its 3-hdc group. Block gently after the border is complete.
For another soft nursery project, see the Tiramisu Baby Blanket or browse more makes in Blankets & Home.
Helpful questions
Is the pebble stitch reversible?
Yes. Alternating single crochet and double crochet are worked on both sides, so the blanket has a softly textured, usable face on each side.
How large is the finished blanket?
At the stated gauge, the body is about 26 × 28¼ inches and the border adds roughly 2 inches on every side for a finished size near 30 × 32¼ inches.
How much yarn should I buy?
Plan for approximately 1,000–1,200 yards of medium / worsted
Can I make the blanket wider or longer?
For width, use an odd starting chain so the number of working stitches is even, then swatch and adjust to the desired measurement. For length, add or remove complete two-row repeats after the setup row. The border does not automatically preserve a custom size or shape, so measure as you work.
What can I do if the edges pull in?
Check that the first and last stitch are worked on every row, keep the turning chain loose, and compare your swatch gauge. Use a larger hook or relax your tension if the fabric is narrower than planned.