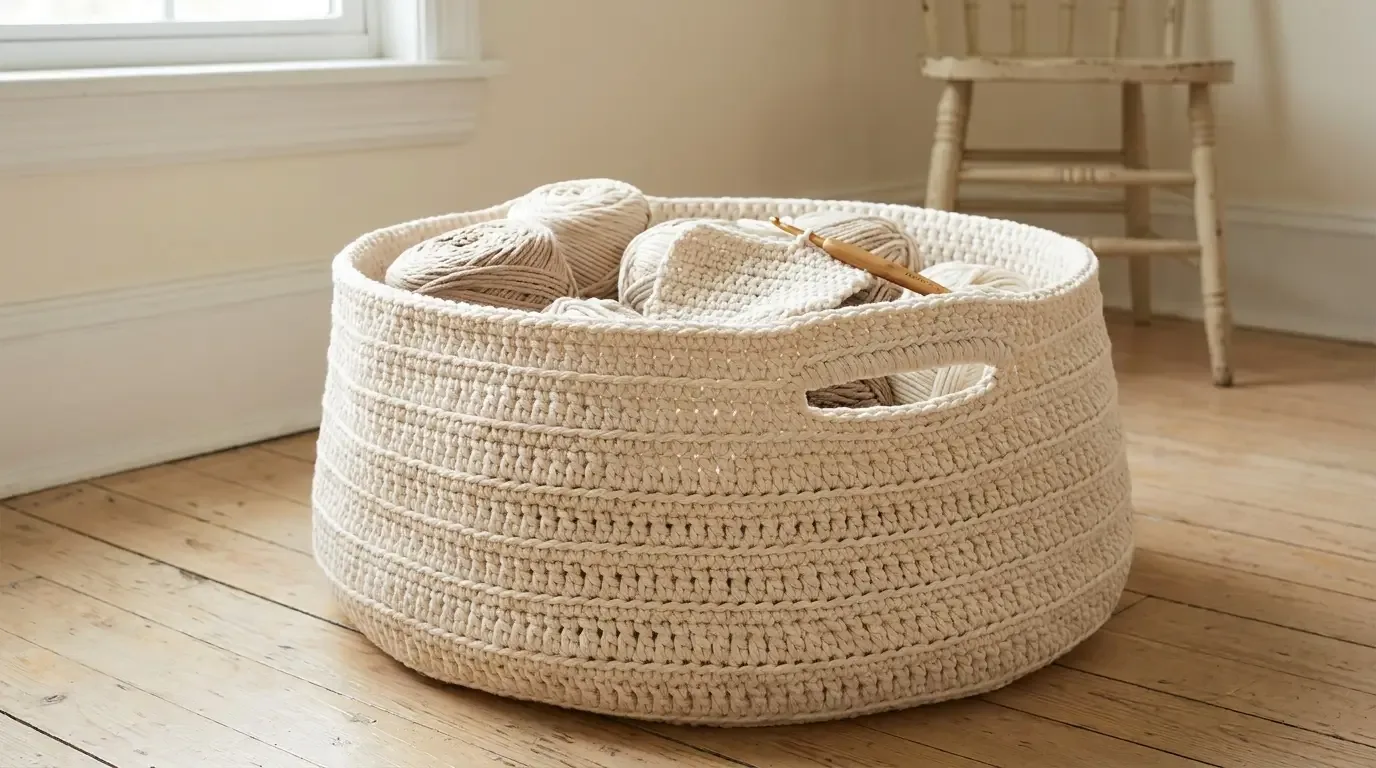
The Maker Basket is a generous, soft-sided storage piece for yarn, blankets, and everyday clutter. Two strands of cream bulky yarn create a substantial fabric, while subtle faceting and built-in hand openings make the basket easy to lift without adding separate straps.
A generous basket for the making life
The Maker Basket is sized for the projects that never stay small: blankets in progress, several balls of yarn, pattern books, or a stack of folded throws. Its warm cream color keeps the piece calm enough for a living room, while the chunky surface gives it the presence of a handwoven storage basket.
This is a one-piece, bottom-up basket. A circular base expands first, the walls rise in joined rounds, and the upper edge finishes with integrated horizontal hand openings. The softly faceted silhouette comes from working selected rounds through back loops, creating gentle ridges without adding a separate lining, lid, wooden base, or decorative hardware.
Materials and fabric planning
- Bernat Maker bulky #5 yarn in cream, two skeins held together;
- approximately 600–634 yards (549–580 metres) total;
- 9 mm crochet hook;
- stitch marker, scissors, tape measure, and a large blunt yarn needle;
- a flat surface for checking the base and a sturdy box for shaping while the walls settle.
Two strands held together make a dense, supportive fabric. Keep the strands side by side rather than twisting them; this helps the BLO ridges read cleanly. The finished basket should stand on its own but still flex enough to lift by the hand openings.
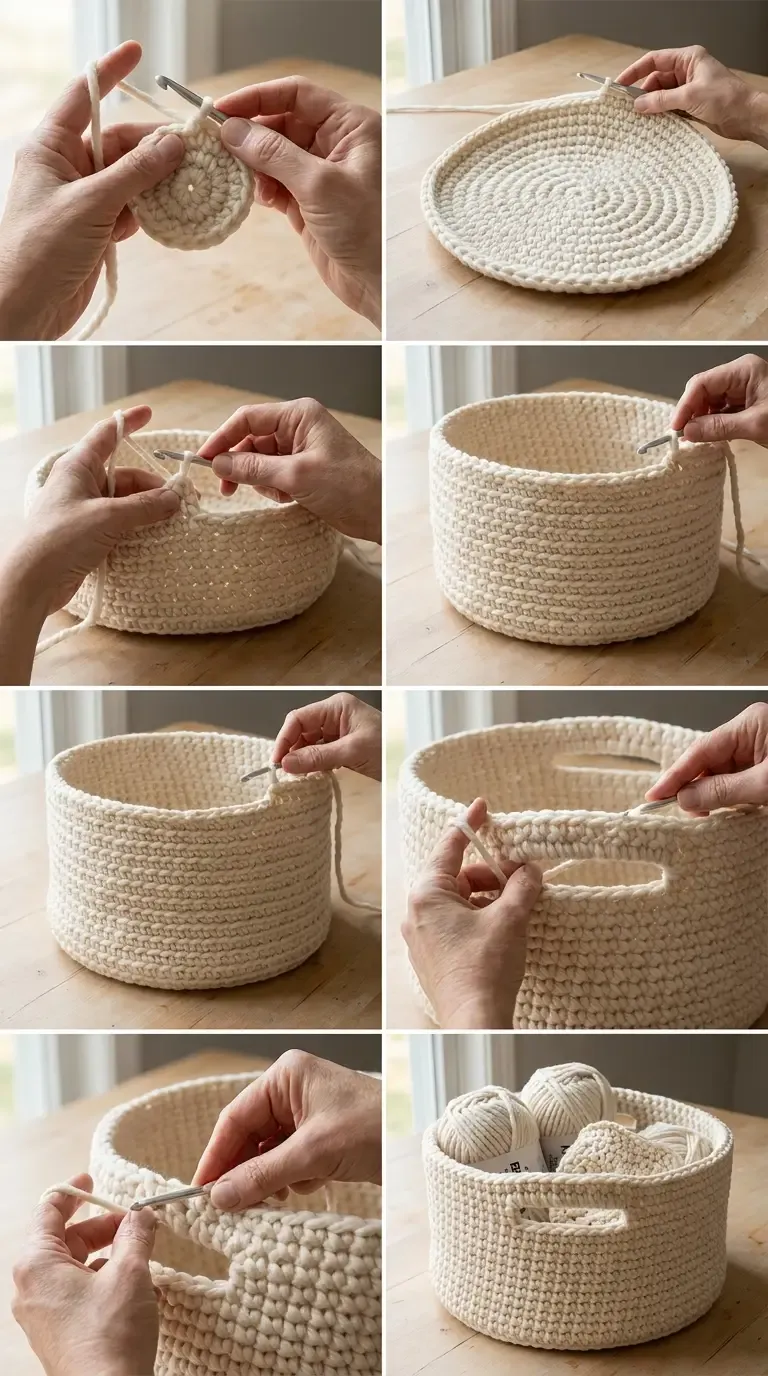
The HookElla construction image follows the basket from its first circular rounds through the finished integrated openings.
Size and proportion checkpoints
The reference sample measures approximately 40 inches around—about 20 inches across when laid flat—and stands close to 11 inches tall in use. The relaxed sample length is about 17 inches, allowing for the soft upper edge and the way chunky yarn compresses when the basket is filled.
Measure the base before the walls become vertical. If the circle is too small, the finished basket will feel tall and narrow; if it is too large, the upper edge may slump outward. Set the basket around a box or folded blanket as the walls rise so the sides dry into an even, softly faceted shape.
Construction overview
- Build the round base. Start with a compact centre and work joined rounds of single crochet, increasing evenly so the disk stays flat. Mark the join at the same point each round to keep the sides aligned.
- Create the turning edge. Once the base reaches the desired diameter, use a back-loop-only transition to define the corner. This small ridge separates the floor from the basket wall and helps the base keep its shape.
- Raise the walls. Continue in joined rounds without increasing. Alternate regular and BLO-focused texture as planned so the surface develops gentle horizontal bands and softly angled facets.
- Check the circumference. Place the work around a box or measure it relaxed on the floor. The wall should rise straight, with only a slight natural taper from the dense yarn.
- Form the hand openings. Near the upper edge, reserve two horizontal openings opposite one another. Work around each opening with firm stitches and smooth corners, keeping the remaining wall continuous so the handles are part of the basket rather than separate straps.
- Reinforce the rim. Add a final firm round around the top, working evenly across the sections above and below each opening. The rim should feel comfortable in the hand and resist stretching when the basket is lifted.
- Finish inside the wall. Fasten off near a side join, weave the tail through several dense stitches, and trim it inside the basket. Turn the basket right side out and check that no loop catches on the contents.
The faceting should remain understated: the basket is rounded and softly structured, not sharply pleated. If the sides look wavy, reduce the hook tension or reshape the basket over a larger temporary form before adding the rim.
Making sturdy integrated openings
The hand openings are the working feature of this basket. Keep them broad and horizontal, with rounded ends rather than abrupt corners. When you return to the wall after each opening, anchor the first and last stitches firmly so the upper edge does not pull apart under weight.
Before weaving the final tail, lift the empty basket by each opening and check the balance. If one side stretches more, add a reinforcing pass around that opening only. Avoid adding separate handles: extra layers can create a hard ridge and change the clean faceted profile.
Filling and styling ideas
Use the basket for a blanket project, a family’s current yarn palette, stuffed toys, magazines, or folded seasonal accessories. The broad opening keeps contents visible, and the cream sample pairs easily with wood, linen, pale walls, and darker accent furniture.
For a tidy craft corner, place a shallow tray or small bowl inside to corral hooks and scissors while leaving the larger yarn balls around it. Keep sharp tools upright and remove them before children or pets can reach into the basket.
Resizing guidance
To make a smaller basket, stop the base expansion earlier and begin the walls once the floor reaches your target diameter. To make a wider basket, add evenly spaced increase rounds before the turning ridge, then keep the wall height proportional. The hand openings should move outward with the new circumference so they remain opposite each other.
Because two strands of bulky yarn create substantial fabric, test a small base section before committing to a large resize. A different yarn or hook can change the circumference quickly. Measure the relaxed basket and the filled basket separately; the dense fabric compresses slightly under weight.
Care and safe use
Follow the yarn label for washing and drying. Support the basket from underneath when it is heavily filled, even though the integrated openings are reinforced. Inspect the rim and openings occasionally for stretched stitches or loose tails, and repair them before lifting a full load.
This is an open storage basket, not a seat or climbing aid. Keep it on a level floor, away from heaters and open flames, and avoid overloading the hand openings. A little structure, a calm color, and a place for every project make the Maker Basket a useful piece of everyday crochet furniture.
Helpful questions
What yarn is used for the Maker Basket?
The sample uses Bernat Maker bulky
How much yarn should I plan for?
Set aside approximately 600–634 yards, or 549–580 metres, depending on tension and finishing.
What size is the finished basket?
The basket is approximately 40 inches around, about 20 inches across when laid flat, and roughly 11 inches tall when standing in use.
Are the handles separate pieces?
No. The horizontal hand openings are formed directly in the upper basket wall, so there are no straps, hardware, or sewn-on handles.
What gives the basket its faceted look?
Joined rounds and back-loop-only work create subtle ridges that catch the light and break up the chunky horizontal texture into soft facets.