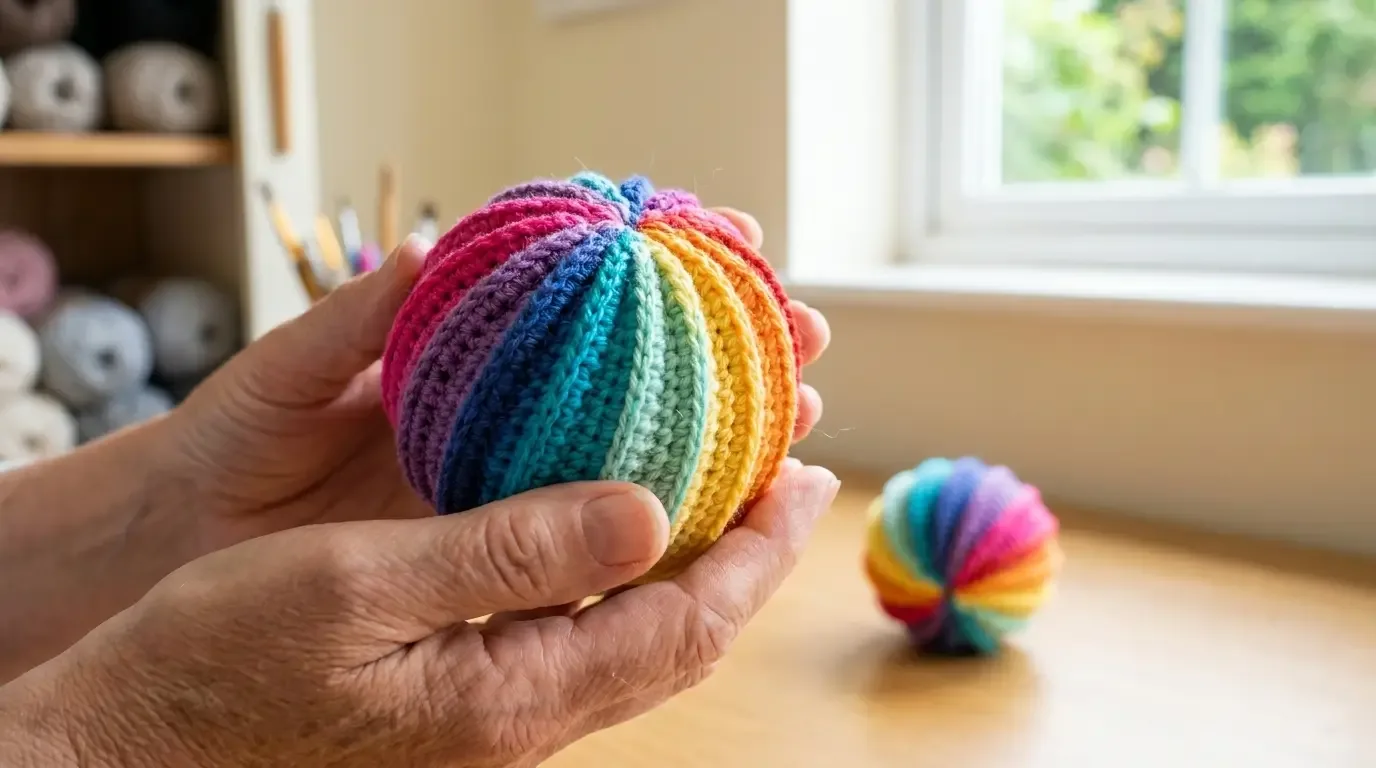
This little rainbow sphere turns simple color changes into a joyful spiral. Raised curved ribs travel from the base toward the crown, giving the ball a smooth, tactile shape that is easy to style as a toy, ornament, or cheerful handmade gift.
A tiny sphere with a joyful twist
The Spiral Rainbow Ball is a compact colorwork project with a big visual payoff. Vivid sections wrap continuously around a true sphere, while raised curved ribs create the look of a soft pinwheel in motion. Make one in bright rainbow shades, repeat a two-color palette, or use leftovers to build a bowl of cheerful little balls.
This HookElla showcase focuses on the construction decisions that make the shape work: a firm cotton fabric, a bottom-up start, controlled increases, and color changes that stay aligned as the ball narrows toward the top.
Materials and gauge
- Scheepjes Catona fingering-weight cotton, or another smooth fingering cotton, in rainbow shades;
- 2.5 mm hook;
- small amount of polyester stuffing;
- yarn needle, scissors, stitch marker, and a row counter;
- optional embroidery thread for a face or tiny surface details.
Use a hook that gives you a dense fabric with no visible stuffing. A loose gauge will make the ribs flatten and can leave gaps at the crown. The small ball uses about 55–77 yards (50–70 metres), depending on how many colors you carry and how generously you weave the tails.
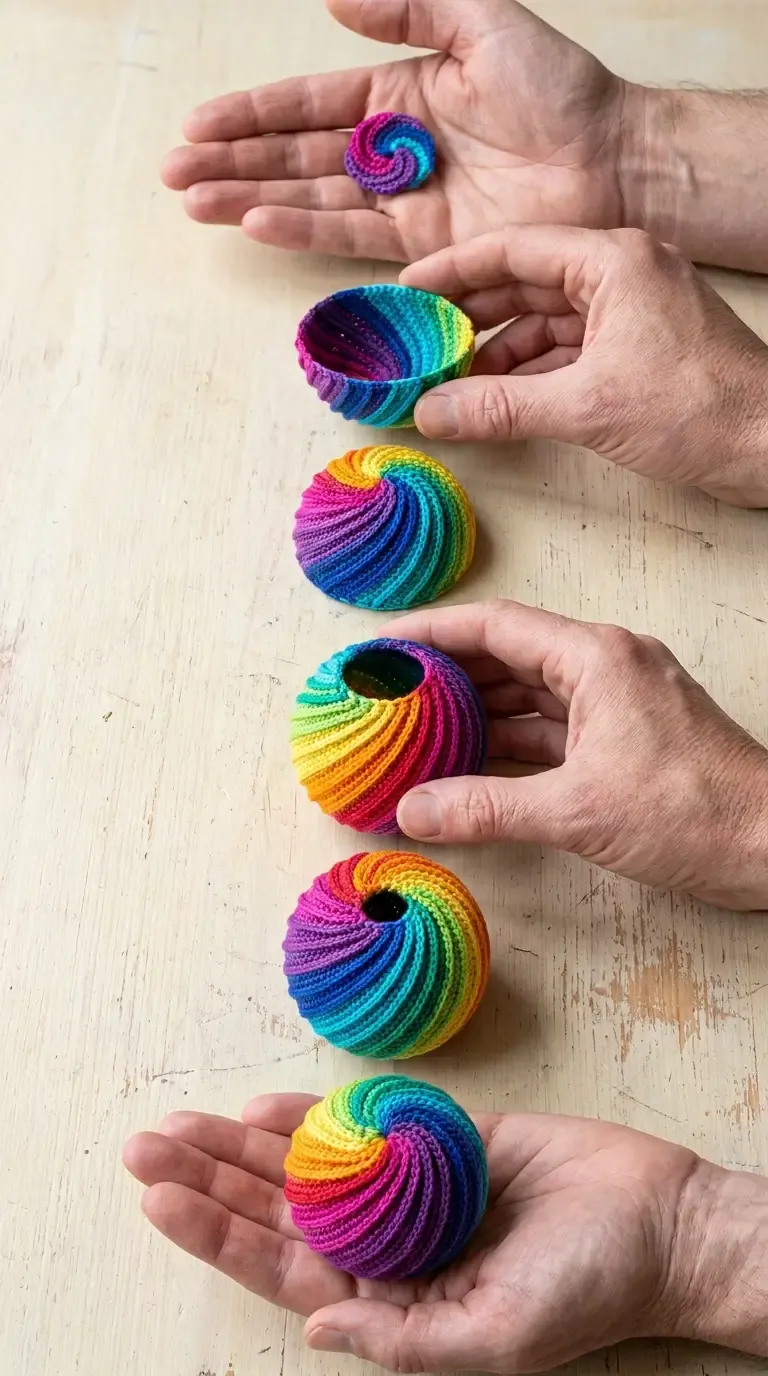
The HookElla construction image maps the project from the first spiral centre through the curved rainbow ribs and final closure.
Choose a finished size
The compact version finishes at approximately 3.5 cm. For a larger 5.5 cm ball, hold the cotton double and keep the same firm tension; the thicker strand naturally enlarges the sphere while preserving the rib definition.
For either size, measure the widest point after the middle shaping rounds rather than waiting until the final closure. If the ball is already too wide, remove an increase round. If it is too narrow, add one evenly spaced increase round before continuing with even rounds.
Plan the rainbow flow
Choose six or more shades and arrange them from warm to cool, cool to warm, or in a repeating spectrum. Wind short butterflies or mini balls before starting so each color change stays light and manageable. Keep the color order written beside your work; a consistent sequence is what makes the ribs appear to spiral instead of stack as stripes.
To keep the surface clean, change color on the final pull-through of the previous stitch. Carry a shade only across a short section; for longer gaps, cut it and rejoin at the next planned section. Leave tails on the inside and secure them as the sphere closes.
Construction overview
- Start at the bottom. Form a small adjustable ring and build a flat circular centre in the first color. Place a marker at the start of each round so the increase rhythm stays visible.
- Grow the lower hemisphere. Increase evenly around the circle until it begins to cup. Keep the fabric firm and smooth; the outer edge should curve upward without ruffling.
- Create the curved ribs. Move through the rainbow sequence in short color sections while working the round fabric. The slight offset between color changes and shaping points lets each band sweep diagonally, producing the raised spiral effect.
- Work the widest section. Pause increases once the ball reaches its fullest circumference. Continue in even rounds and check that the sphere remains round rather than oval.
- Begin the crown decreases. Decrease at matching intervals around the round, keeping the color changes in the same order. Add stuffing gradually before the opening becomes too small to reach comfortably.
- Close and finish. Use the final decreases to gather the crown, add the last pinch of stuffing, then thread the yarn through the remaining stitches and pull closed. Hide the tail deep inside the ball.
The rib effect comes from consistency rather than complicated shaping: firm tension, even increases and decreases, and color changes that travel in the same direction from round to round. Turn the work in your hands after each few rounds so you can catch a flat spot early.
Stuffing and surface shaping
Use small wisps of stuffing instead of one large plug. Fill the lower half first, pressing the fibre toward the outer wall so the ribs stay rounded. Add more as the crown closes, but stop before the stitches stretch open. A lightly packed ball feels softer and shows the curved color sections more clearly than an overfilled one.
If one rib looks deeper than its neighbors, massage the stuffing from the inside with the blunt end of your hook. Do not pull the outer stitches; redistributing the filling keeps the cotton fabric even and avoids a lumpy silhouette.
Finishing ideas
Leave the sphere plain for a modern rainbow stress ball, embroider a tiny face for a pocket pal, or add a discreet hanging loop before closing for an ornament. For a baby-safe version, skip safety eyes and glued decorations; use only securely embroidered details and supervise play.
Make a set in different color orders for a party favor bowl, attach one to a wrapped gift, or display several in a shallow dish. The larger doubled-yarn version works especially well as a tactile desk accent, while the small version is light enough for a garland.
Care and resizing notes
Cotton keeps the colors crisp but can relax after washing. Hand wash or use the yarn label’s gentlest cycle, reshape the ball while damp, and dry it fully before storing. To scale the design beyond the two suggested sizes, change yarn weight and hook together, then adjust only the number of increase and decrease rounds needed to keep a spherical profile. Always test one sample before committing to a full rainbow set.
Helpful questions
What makes the ball look spiral-shaped?
Narrow color sections are worked in a bottom-up round construction, while the shaping and stitch placement lift each section into a curved rib that sweeps around the sphere.
What yarn and hook suit this project?
Smooth fingering-weight cotton and a 2.5 mm hook create a firm, defined fabric. The larger version is made with doubled yarn for extra scale.
How much yarn is needed?
Plan on roughly 55–77 yards, or 50–70 metres, for the small-to-standard versions, with a little extra for tidy joins and finishing.
Is this a good first amigurumi project?
It is approachable if you are comfortable with magic rings, increases, decreases, joined rounds, and changing colors. The final shaping benefits from patient stuffing and checking the silhouette as you work.
Can I use the ball as a baby toy?
Use it only with age-appropriate supervision. Embroidered details are safer than detachable pieces, and every join should be checked before the ball is handled by a child.