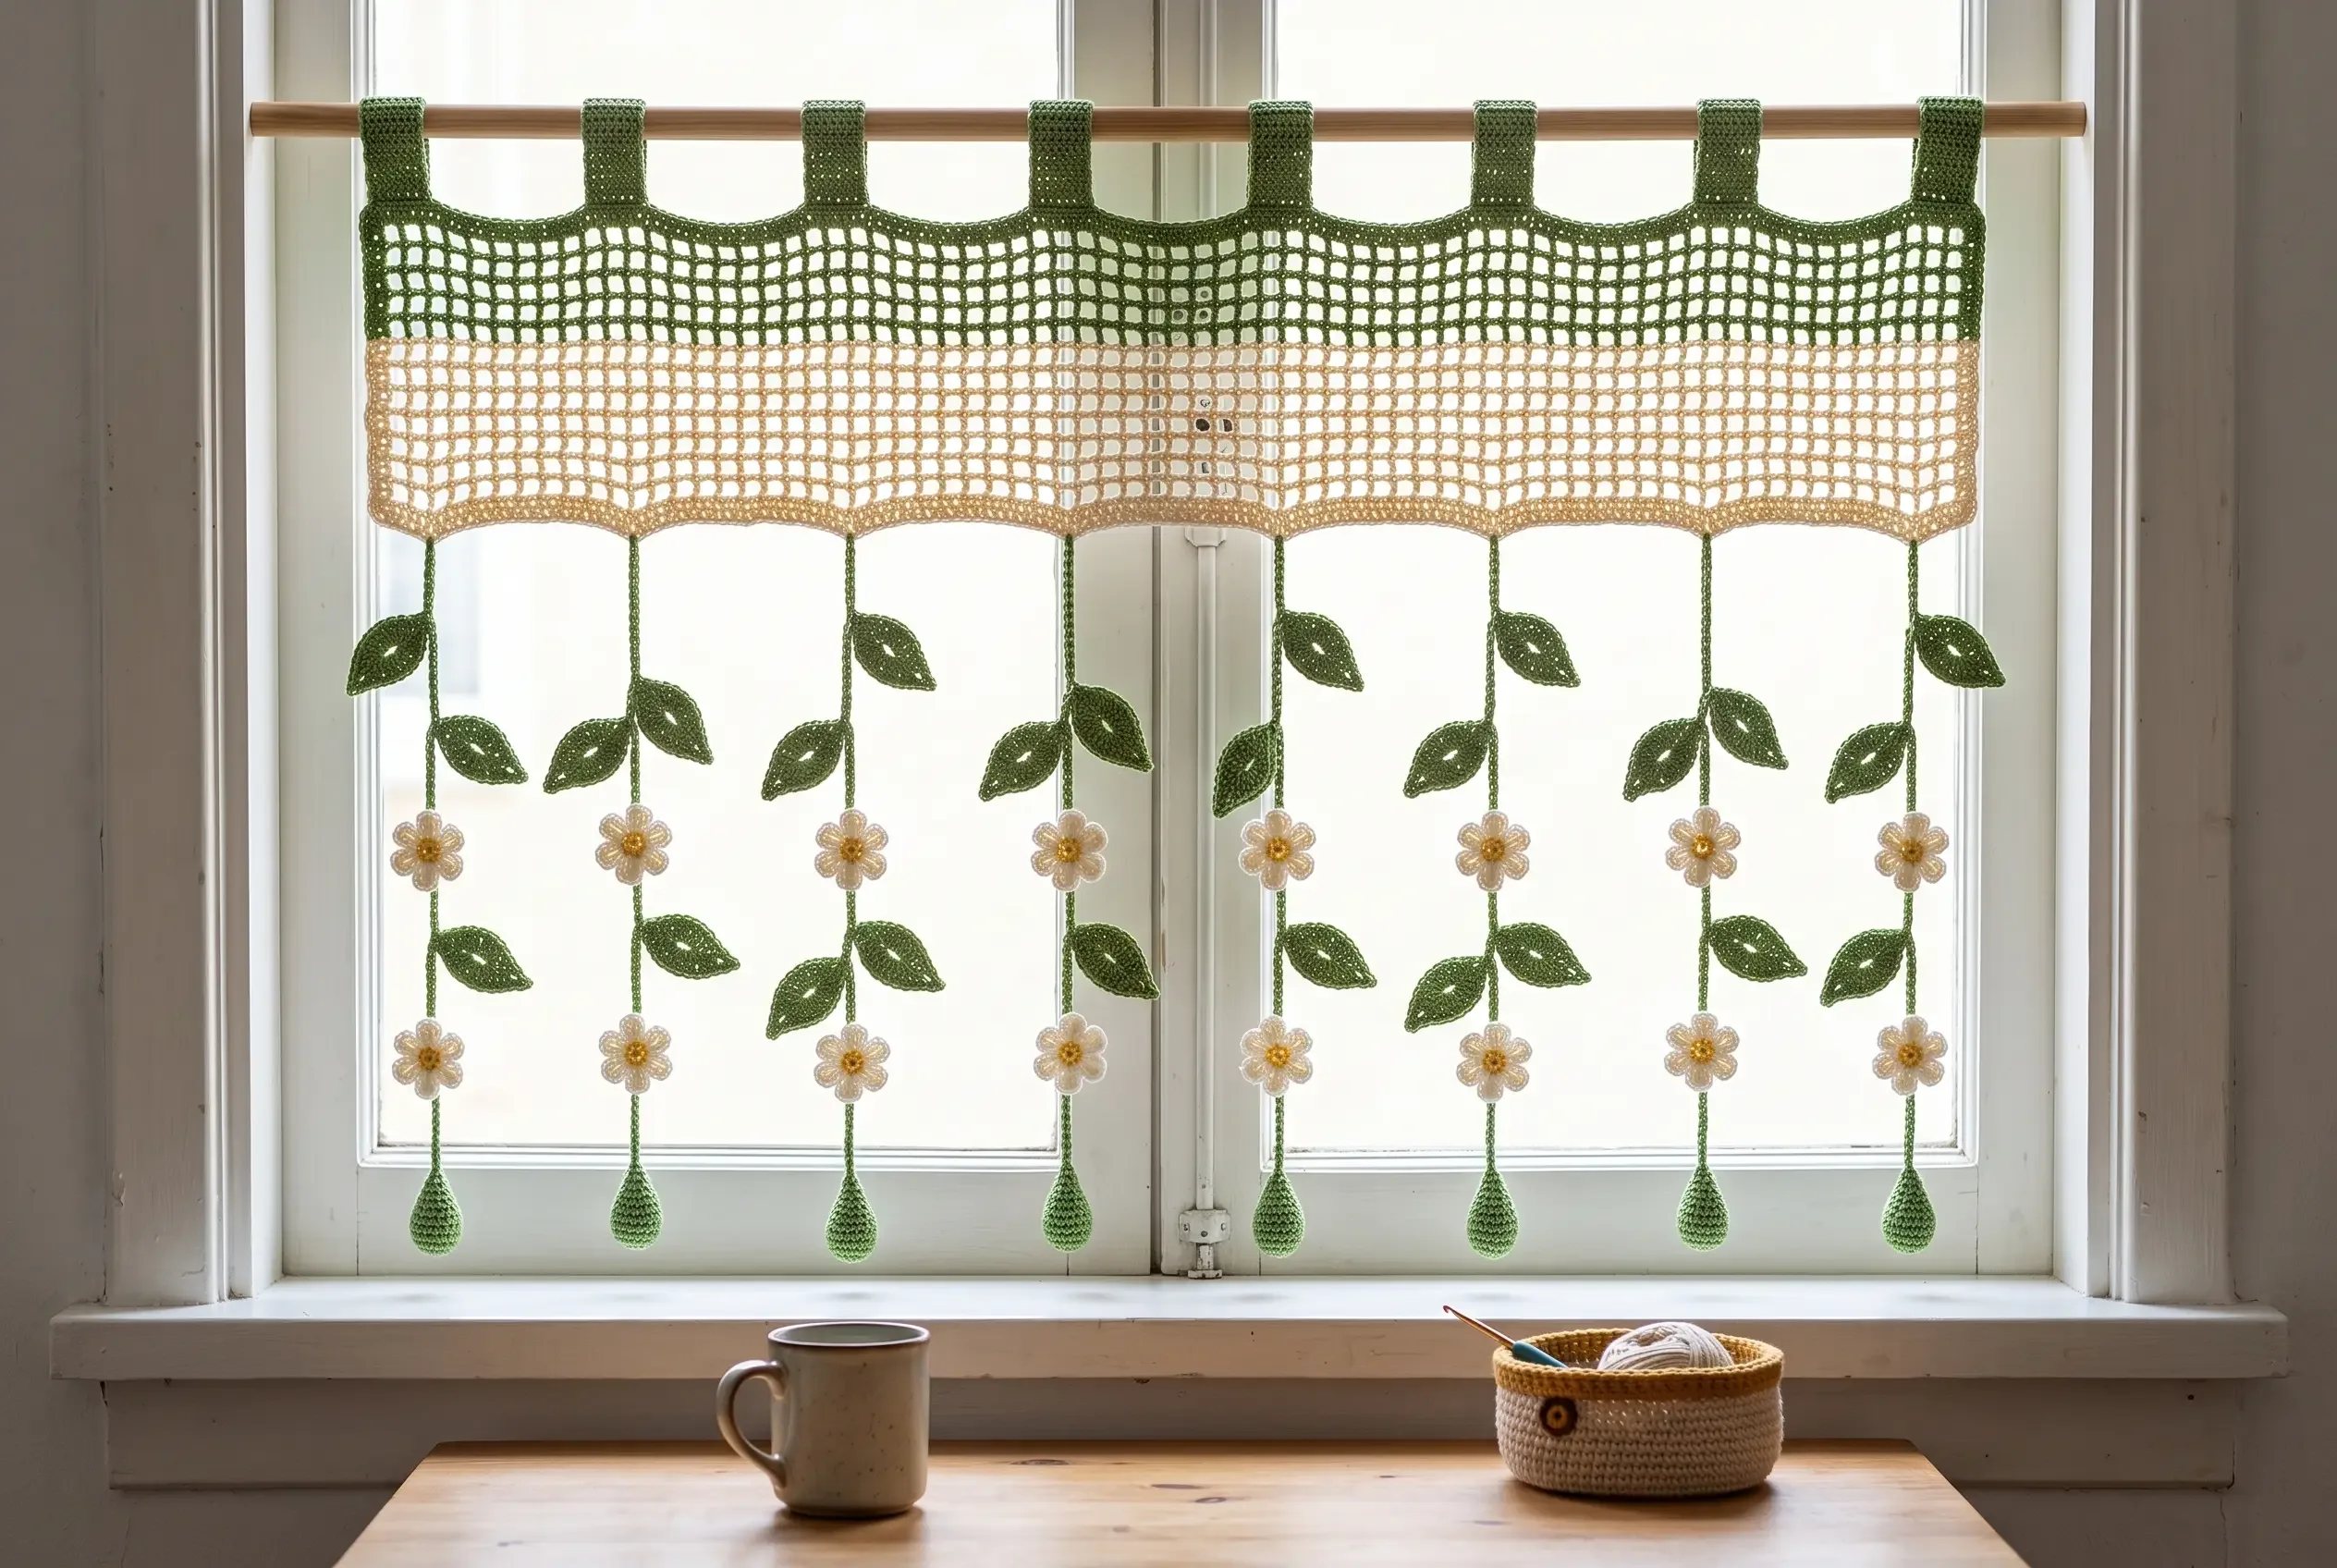
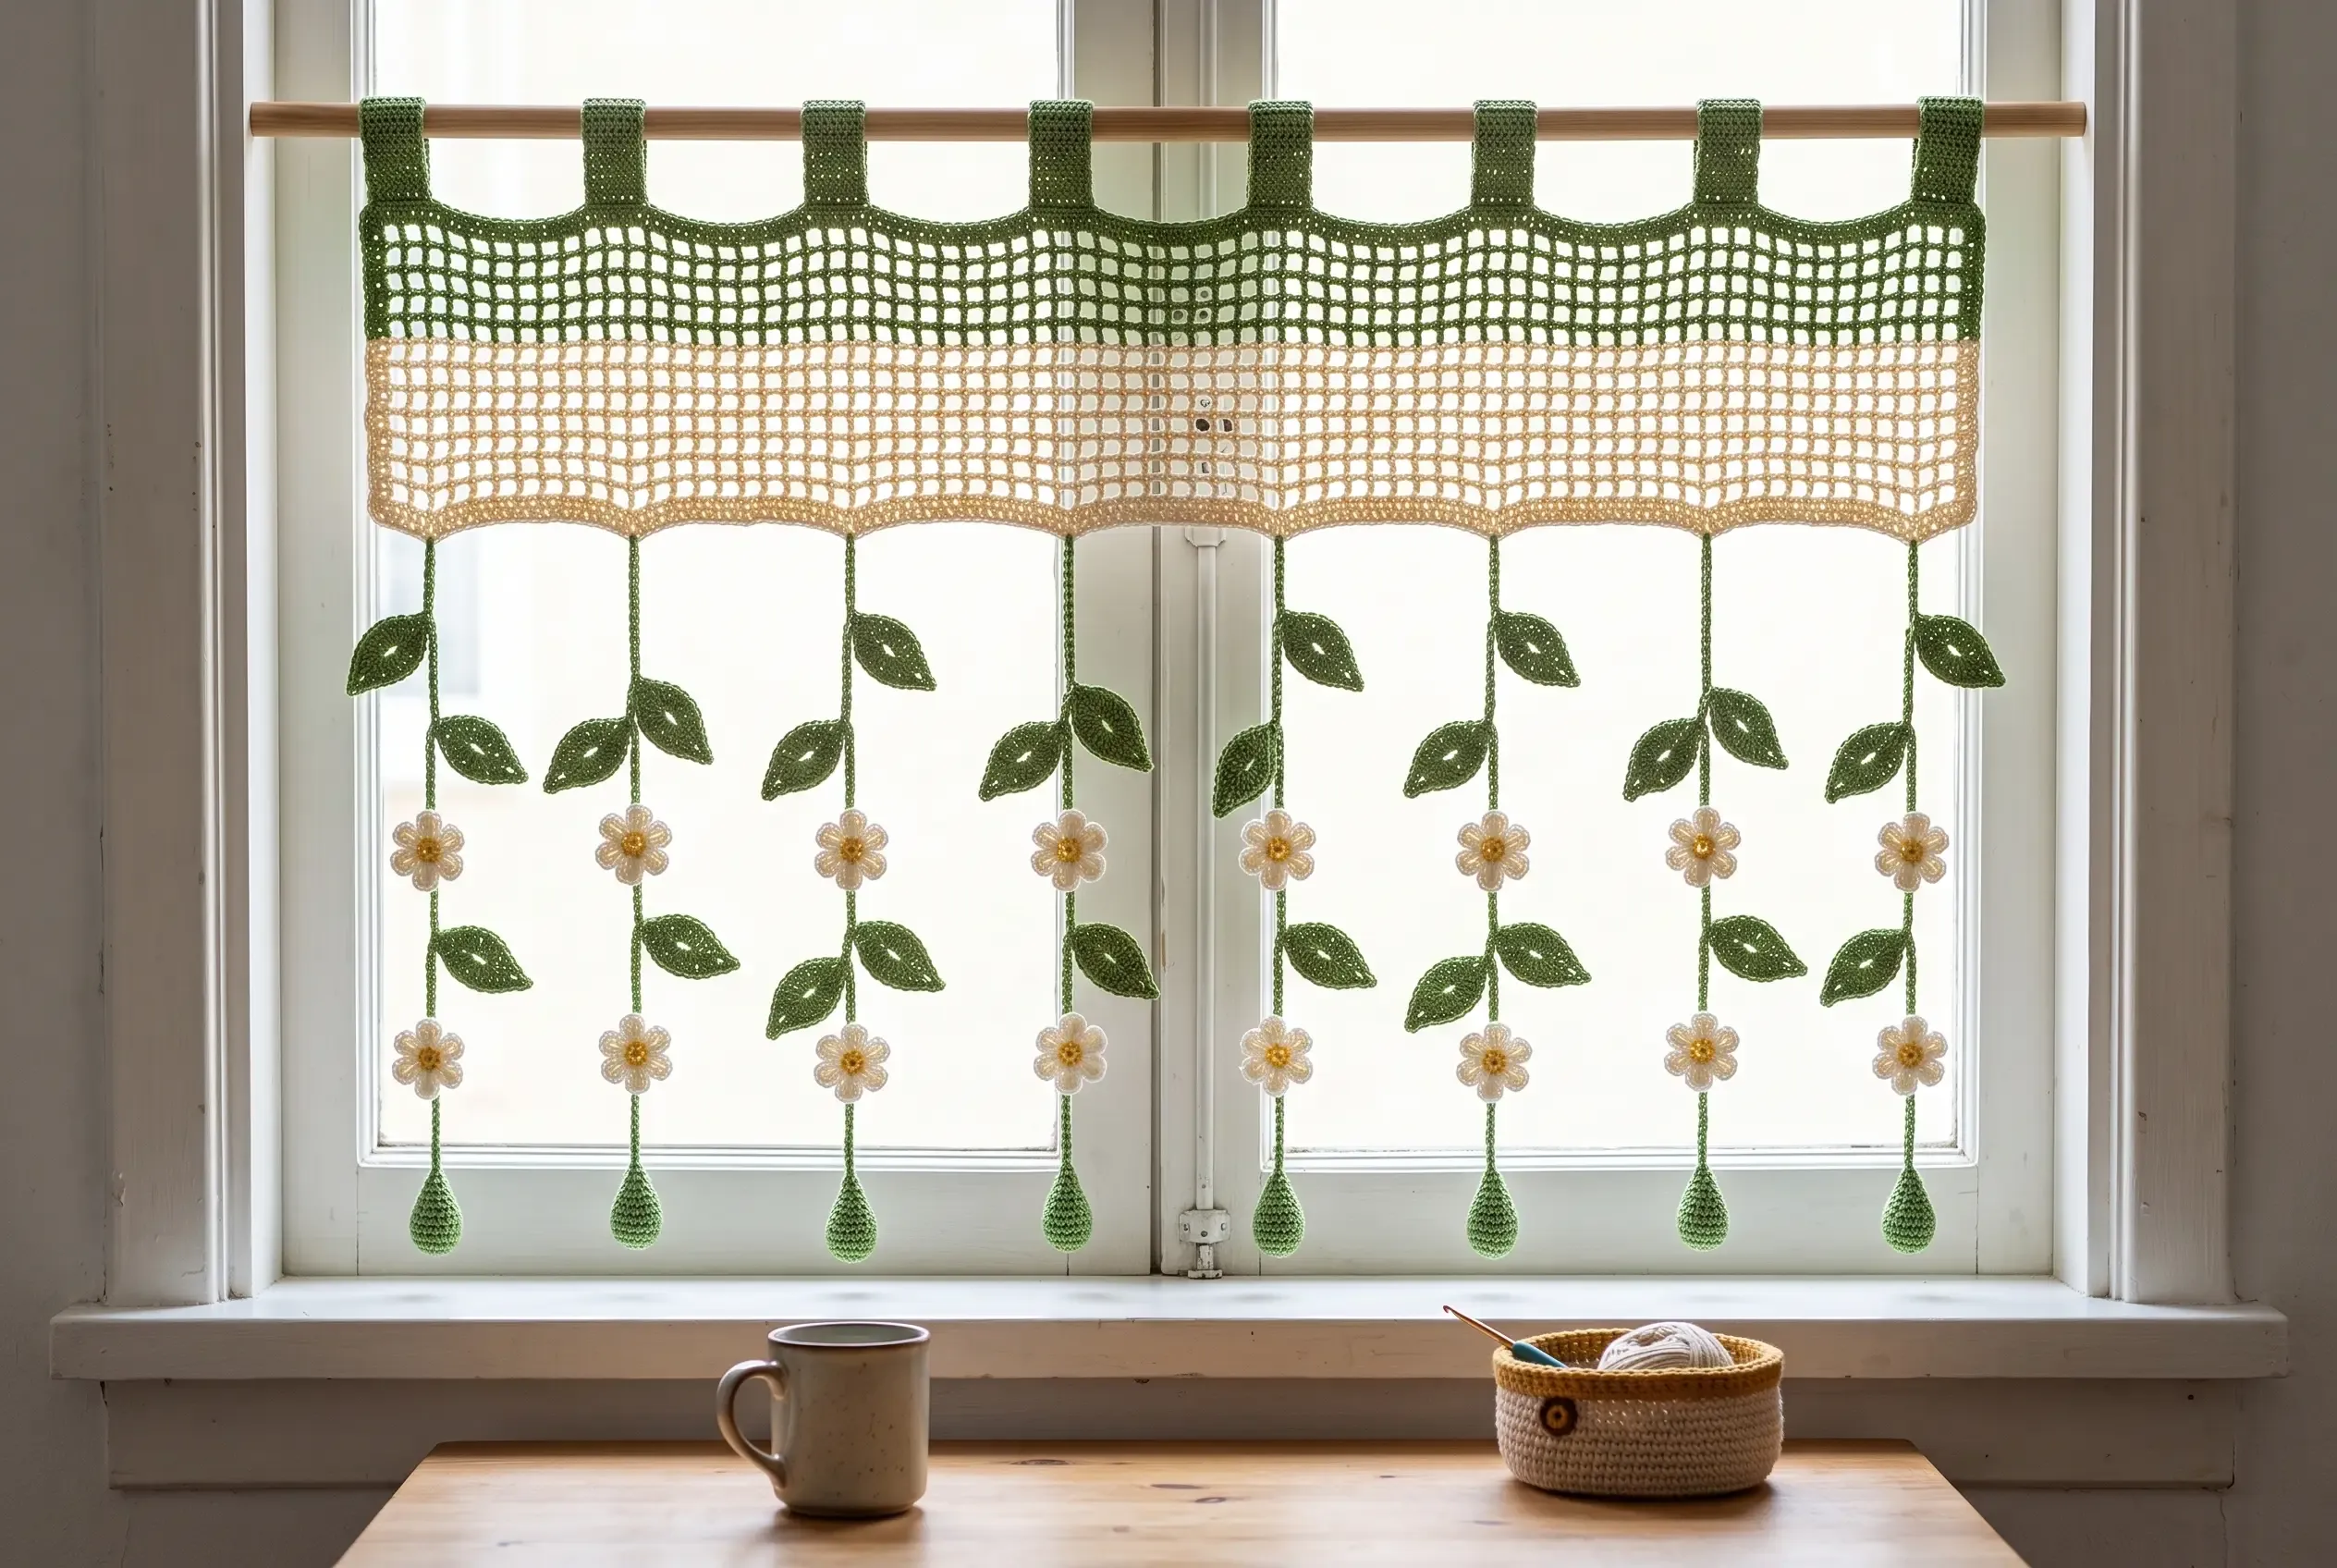
Bring a little garden feeling to a sunny window with this airy crochet flower curtain. A simple filet-mesh valance supports eight leafy vines, while cream flowers and small teardrop weights give each branch a graceful, balanced drop.
A little garden for the window
This Crochet Flower Curtain With Hanging Vines turns a plain window into a soft, handmade focal point. The upper panel is an uncomplicated filet mesh: three green rows transition into four warm-cream rows, then eight folded tabs loop around a wooden rod. Below it, alternating vine layouts keep the leaves from lining up in rigid rows.
The sample uses a 90 cm rod, an approximately 82 cm valance, eight branches, and an overall drop of about 95–100 cm. It is decorative rather than blackout fabric, so daylight still filters through the open mesh.
Materials and planning
- DK or light worsted yarn in leaf green, warm cream, and a small amount of yellow
- 4.0 mm crochet hook
- Yarn needle, scissors, and stitch markers
- A small amount of fiberfill for the eight teardrop weights
- Approximately 90 cm wooden curtain rod
- Measuring tape and rust-proof pins for blocking
Choose smooth, colorfast yarn so the filet squares stay crisp and the leaves hold their points. Cotton or a cotton blend is especially practical near a sunny window. Keep the finished curtain away from open flames and check that the rod and wall hardware are rated for its weight.
Finished measurements and layout
The sample valance is about 82 cm wide on a 90 cm rod. The hanging branches measure approximately 87 cm each, and the complete curtain drops roughly 95–100 cm from rod to the lowest teardrop. Eight tabs support eight branches; four Type One and four Type Two vines alternate from left to right.
Each branch carries six leaves and about five flowers, for approximately 40 flowers total. Small variations are expected as blocking and flower placement settle.
Abbreviations (US terms)
- ch — chain
- sc — single crochet
- hdc — half double crochet
- dc — double crochet
- sl st — slip stitch
- st(s) — stitch(es)
- sp — space
- MR — magic ring
Construction overview
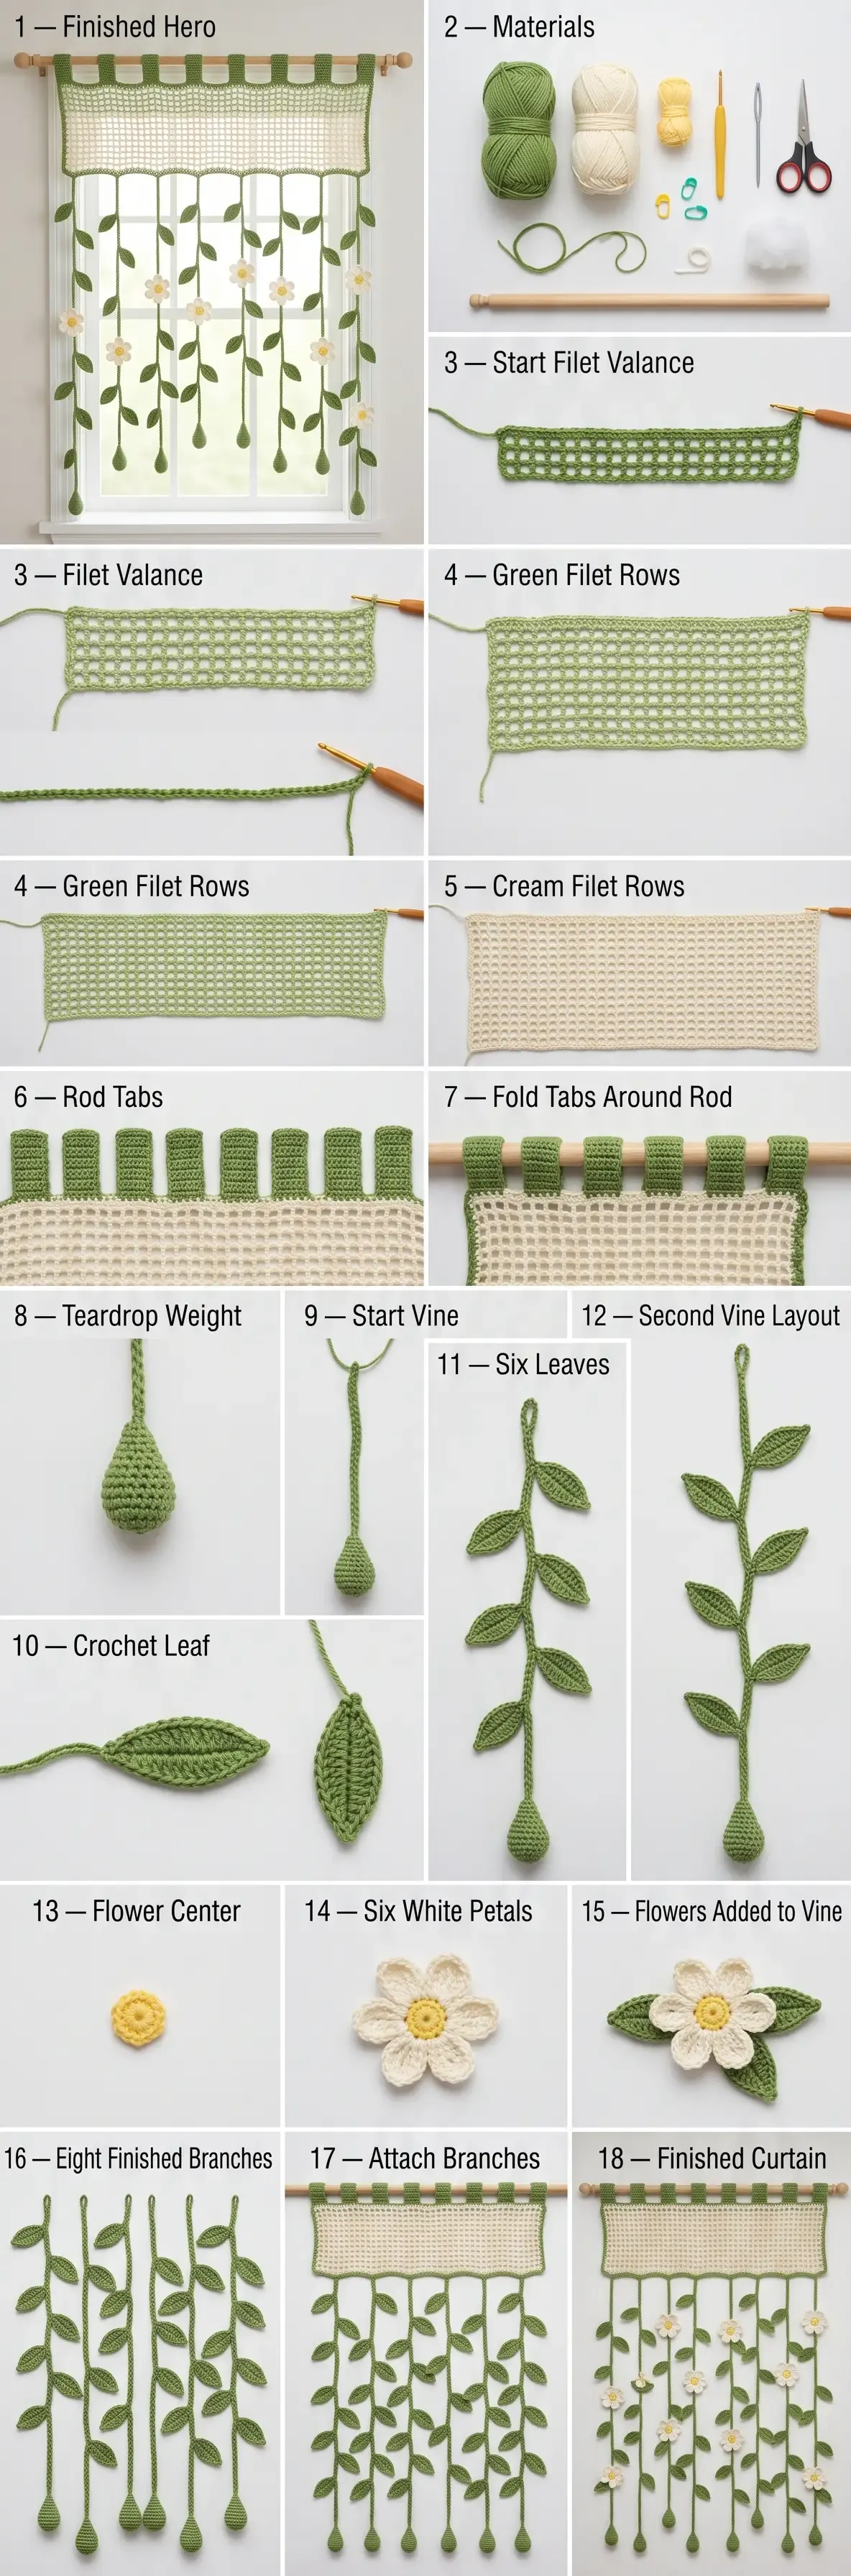
Work the valance flat first. A 160-chain foundation plus turning setup establishes a straight filet panel with no increases or decreases. Work three green filet rows, then four cream filet rows. Add a neat top edge and eight green tabs, spaced evenly so each tab sits over a strong section of the valance.
Make the eight vines separately from the lower teardrop upward. Each vine has a lightly stuffed weight, a long chain, six pointed leaves, and a short finishing chain. Sew the vines to the valance beneath the tab positions, alternating the two layouts to create varied heights. Add flowers after the vines are secure so you can balance the composition in the window.
Filet-mesh valance
Foundation and mesh rows
- With green yarn, ch 160. Ch 3 for the turning setup; the foundation chain itself is the width reference.
- Row 1 (green): Dc in the fourth chain from the hook and in each chain across — approximately 158 dc. Turn.
- Rows 2–3 (green filet): Ch 3, then work a simple open mesh across: dc in the next stitch, ch 1, skip 1 stitch; repeat the mesh rhythm to the final stitches and finish with dc. Keep the same number of mesh columns across; do not increase or decrease. Turn after each row.
- Join cream yarn without tightening the edge. Rows 4–7 (cream filet): Continue the established mesh rhythm for four rows, keeping the side edges straight and the column count unchanged. Turn after every row.
The exact mesh tension determines the final width. A relaxed DK swatch should settle near 82 cm. If your panel is narrower, use a larger hook or add foundation chains in pairs; if it is wider, reduce the foundation in pairs. Always keep the side edges aligned so tabs can be distributed evenly.
Top and lower edges
Work one tidy sc row along the top edge and one along the lower edge, placing a sc around each row-end or mesh anchor as needed. The edge should lie flat, not ruffle. Fasten off cream at the lower edge and weave in ends before adding tabs.
Eight rod tabs
Make 8 green tabs. For each tab, ch 12 and work 10 sc back across the chain for four rows. Fasten off with a long tail. Fold the rectangle over the rod and sew its short ends securely to the top edge of the valance, forming a channel wide enough for the 90 cm rod.
For even spacing on the sample, place tab centers at approximately 10, 30, 50, 70, 90, 110, 130, and 150 foundation-stitch positions. Measure from the same side each time; shift by a stitch or two if your blocked panel calls for it. Slide the rod through all channels only after every tab seam is firm.
Leaf motif
Each leaf begins with a 10-chain foundation. Work along one side of the chain with short stitches that rise toward the middle (sc, hdc, dc, taller dc as needed), place a small point at the center, then decrease the heights toward the opposite tip. Continue around the other side of the foundation so both halves mirror one another. Close with a sl st and a final sc edging if desired.
Keep the center spine firm but not tight. The finished leaf should be pointed at both ends, gently cupped, and approximately 4–5 cm long in DK yarn. Block leaves under a damp cloth with the spine straight. Make 48 leaves total—six for each of the eight branches.
Teardrop weight
With green yarn, form an MR and work sc rounds, increasing evenly until the small cup is about 2 cm wide. Work several even rounds, add only a pinch of fiberfill, then decrease symmetrically and close the opening. Pull the yarn tail through the top so the teardrop has a narrow attachment point. Keep it light enough that the vine hangs straight without stretching the valance.
Branch Type One (make 4)
- Begin at the teardrop and chain 18 before attaching the first leaf.
- Secure Leaf 1 through both loops of the chain, then chain 24.
- Attach Leaf 2; repeat ch 24, attach the next leaf until all six leaves are placed.
- After Leaf 6, chain 24 more before fastening off at the valance end.
The resulting branch is approximately 87 cm after blocking and includes the teardrop, six leaves, five 24-chain intervals, and the finishing chain. Leave long tails at both ends for secure sewing.
Branch Type Two (make 4)
- Begin at the teardrop and chain 30 before attaching Leaf 1.
- Attach six leaves using ch 24 between each leaf.
- After Leaf 6, chain 12 to finish at the valance.
Type Two has the same six-leaf count and similar overall reach, but the first leaf starts higher and the final segment is shorter. Alternate Type One and Type Two across the curtain: 1, 2, 1, 2, 1, 2, 1, 2.
Flowers
Center
With yellow yarn, make an MR and work 8–10 sc into the ring. Close, fasten off, and leave a tail for sewing. Keep the center flat.
Six petals
Join cream beside the yellow center. For each petal, work a compact group of stitches into the next center stitch or space—sc, hdc, dc, hdc, sc—then sl st to the next space. Repeat until there are exactly six petals. Fasten off and weave the cream tail to the back. Make about 40 flowers, checking that every flower has six evenly rounded petals and a flat back.
Assembly and placement
- Lay the blocked valance flat and mark eight branch positions directly below the tab centers.
- Sew each vine’s upper chain to several strong valance stitches, passing the needle through more than one mesh strand. Do not rely on a single open square.
- Alternate Type One and Type Two from left to right. Hang the rod temporarily and check that the teardrops finish at balanced, staggered heights.
- Arrange five flowers along each branch, usually between leaves rather than directly on a leaf tip. Stitch through the flower center and a second point on the vine so petals cannot spin.
- Turn leaves and flowers slightly toward the room. Small direction changes make the curtain look natural instead of perfectly mirrored.
- Slide the finished rod through all eight tabs and install it with secure, level hardware.
Blocking and finishing
Mist the valance, leaves, and vines, then pin them on a clean towel or blocking mat. Square the filet panel first, straighten each vine, and open the leaf points with your fingers. Let everything dry fully before sewing flowers. Trim tails only after every seam has been tug-tested gently.
Troubleshooting
- Valance ripples: loosen the mesh tension or redistribute edge stitches; the seven rows should remain flat.
- Tabs pull together: spread their centers evenly and reinforce each tab with two rows of sewing.
- Branches line up: confirm the alternating Type One/Type Two order and vary flower positions within their chain intervals.
- Teardrops look bulky: remove fiberfill until they are lightly weighted, not plush.
- Flowers twist: add a second small securing stitch at the back of the center.
Customizing the curtain
For a wider window, add foundation chains in pairs and keep the filet columns consistent. Divide the new width into an even number of tab positions so branches remain balanced. For a shorter drop, reduce the pre-leaf or between-leaf chains proportionally; for a longer curtain, add equal chain length before the first leaf and after the last leaf rather than stretching the valance. Keep six leaves per branch and alternate the two layouts for the same staggered rhythm.
FAQ
Can I use only one yarn color?
Yes. A single green or cream panel creates a calmer look; the two-color valance simply makes the mesh transition easier to see.
Are the flowers removable?
They can be sewn on with longer tails and carefully clipped knots, but permanent stitching is safer for a curtain that will be handled. Check attachments periodically.
Is this suitable for a child’s room?
Use secure hardware, keep the curtain well out of reach of cribs and cords, and supervise children around any hanging decoration. It is decorative home décor, not a toy.
How do I wash it?
Follow the yarn label. Hand wash or use a gentle cycle in a mesh bag, reshape while damp, and air dry flat. Remove the wooden rod first.
Final thoughts
With a flat seven-row valance, eight evenly supported tabs, and alternating six-leaf vines, this curtain is a manageable way to bring crochet into a window. The cream flowers and small teardrop weights add movement without making the piece heavy. Adjust the width and drop to your space, block patiently, and enjoy a little handmade garden whenever the light comes through.
Helpful questions
How many branches does the curtain use?
Make eight branches total. Alternate four Type One branches and four Type Two branches so leaves and flowers land at staggered heights.
How many leaves go on each vine?
Every branch has exactly six leaves. Type One and Type Two differ only in the chain spacing before the first leaf and after the last leaf.
Will the 160-chain valance fit a 90 cm rod?
With DK or light worsted yarn and a 4 mm hook, the sample foundation is sized for an approximately 82 cm valance, leaving a little rod visible at each side. Swatch and adjust the foundation for your window.
Are the teardrops stuffed?
Yes, but only lightly. A small amount of fiberfill gives each green teardrop enough weight to hang straight without turning it into a bulky plush ornament.