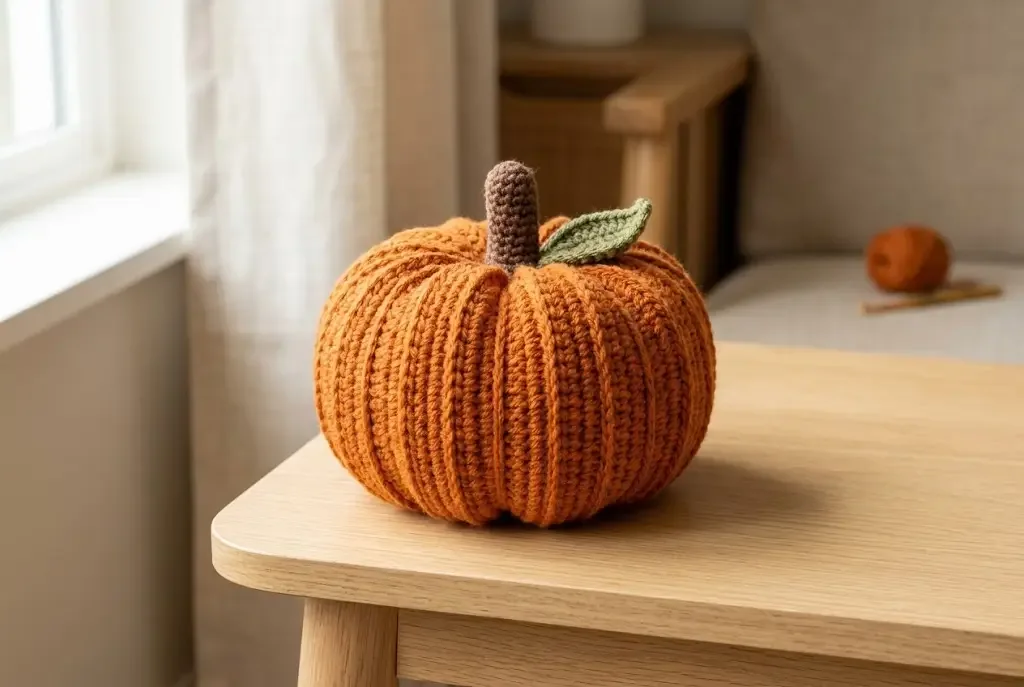
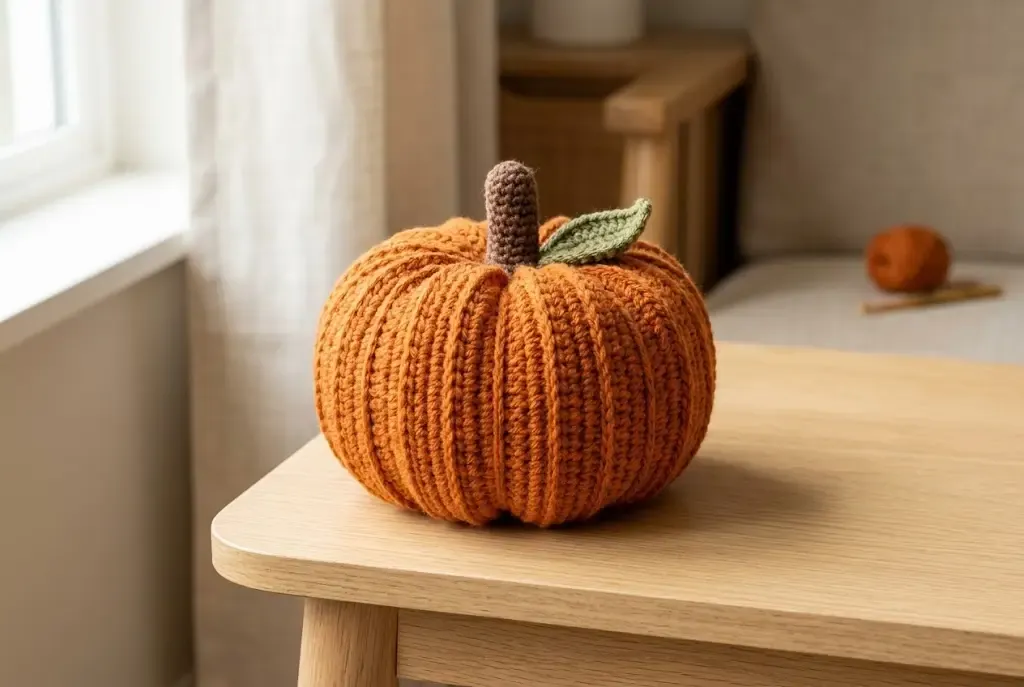
This easy ribbed crochet pumpkin starts as one rectangle worked in half double crochet through the back loop. After the short seam is joined, simple gathering and a few shaping wraps turn the fabric into a plump pumpkin without complicated increases.
About this pattern
This seasonal pumpkin is built from a single ribbed rectangle rather than a sphere of increasing rounds. The short edge becomes the height of the pumpkin, while the rows make the circumference. Once the rectangle is seamed into a tube, both openings are gathered around polyester stuffing. Six to eight yarn wraps create the characteristic pumpkin sections.
The pattern uses US terminology and is written for a firm, textured fabric. It is an original HookElla pattern based on the supplied construction details; it has not been physically tested.
Materials
- Worsted-weight (category 4) yarn: approximately 120–150 yd (110–137 m) pumpkin orange
- Small amounts of brown yarn for the stem and olive-green yarn for the leaf
- 5 mm (H-8) crochet hook, or the size needed for a firm fabric
- Polyester fiberfill stuffing
- Tapestry needle, scissors, and a stitch marker
Finished size and gauge
The finished pumpkin is approximately 5.5–6 in (14–15 cm) tall and 6–7 in (15–18 cm) wide, depending on stuffing and tension. Before seaming, the ribbed rectangle should measure about 11.5–12 in (29–30.5 cm) long by 6–6.5 in (15–16.5 cm) tall. Gauge is flexible for a decorative project; use your hook to achieve those rectangle measurements with a dense, pliable fabric.
Abbreviations
- ch — chain
- hdc — half double crochet
- hdc BLO — half double crochet through the back loop only
- sc — single crochet
- sl st — slip stitch
- st(s) — stitch(es)
Pattern notes
- Turning chains do not count as stitches.
- Work the main rectangle flat, turning after every row.
- In HDC-BLO, insert the hook under the back loop only; the unused front loop creates the raised rib on the opposite side.
- Leave a long tail at the rectangle seam and at both gathers so it can be used for sewing and shaping.
Instructions
Ribbed rectangle
- With pumpkin-orange yarn, ch 19.
- Row 1: Hdc in the third chain from the hook and in each chain across — 18 hdc. Turn.
- Rows 2–36: Ch 2, hdc BLO in each stitch across — 18 hdc. Turn after every row.
Fasten off, leaving a long tail. The rectangle should be approximately 11.5–12 in (29–30.5 cm) long and 6–6.5 in (15–16.5 cm) tall. If your row gauge is tighter or looser, stop when the panel reaches those measurements rather than adding unplanned shaping.
Seam the tube
Fold the rectangle so the first and last rows meet, with the ribbed side facing out. Using the long tail and a tapestry needle, whipstitch the two short edges together stitch by stitch. Knot securely and weave the end inside. You now have an open tube with a top and bottom edge.
Gather the bottom and stuff
- Thread orange yarn through the stitches around one open edge, taking a small, even bite in each stitch.
- Pull the yarn gradually to close the opening. Take a few extra stitches across the center if a small hole remains, then knot securely.
- Turn the gathered end to the inside if needed and begin adding polyester fiberfill from the opposite opening. Fill the pumpkin firmly enough to hold its shape, smoothing the sides as you work.
Gather the top
Thread a second length of orange yarn through the remaining open edge. Pull it closed around the stuffing, adjusting the tension until the top has a shallow dimple rather than a sharp puckered point. Secure the yarn with several knots and weave the tail through the body.
Add the pumpkin shaping
For the external sections, use a doubled strand of orange yarn and a long needle. Bring the yarn from the bottom center, over the top center, and back down through the bottom. Pull gently to indent the side. Repeat around the pumpkin to create 6–8 evenly spaced wraps. Keep the tension consistent: the ribs should dip into rounded lobes, not flatten completely. Hide the final knot at the base.
Stem
With brown yarn, ch 7.
- Row 1: Sc in the second chain from the hook and across — 6 sc.
- Rows 2–6: Ch 1, sc across — 6 sc.
Fasten off, leaving a tail. Roll the strip into a narrow tube with the rows running vertically and sew the long edge together. Stitch the stem firmly to the center of the pumpkin top, passing the needle through the gathered stitches for stability.
Leaf
With olive-green yarn, ch 7. Starting in the second chain from the hook, work sl st, sc, hdc, dc, hdc, sc along one side of the chain. Ch 1, then work the same sequence back along the opposite side of the foundation chain. Slip stitch to the first stitch, fasten off, and leave a sewing tail. Shape the leaf with your fingers and sew it beside the stem.
Finishing and care
Weave in remaining ends on the inside. Gently roll the pumpkin between your hands to even out the stuffing and redistribute the shaping wraps. Keep the pumpkin dry and follow the yarn label if it needs spot cleaning; do not machine-wash a stuffed piece unless the fiberfill and yarn care instructions allow it.
Helpful tips
- Count the 18 stitches at the end of Row 1 and every later row to keep both rectangle edges straight.
- If the panel curls, loosen your turning chain slightly or use a hook one size larger for the rectangle only.
- Gather in small increments instead of pulling one hard tug; this prevents a lopsided base.
- Mark the first shaping wrap, then space the remaining wraps by eye around the circumference.
Helpful questions
Can I make this pumpkin larger?
Yes. Add rows to make the rectangle longer for a wider pumpkin, and add foundation-chain stitches for a taller pumpkin. Make a small test panel first so the two dimensions still create the shape you want.
Is gauge important for this project?
Exact gauge is flexible for decor. The rectangle measurement and the 18-stitch foundation are the useful checkpoints; adjust your hook so the fabric is firm but easy to gather.
What yarn is best for a ribbed crochet pumpkin?
A smooth worsted-weight (category 4) acrylic or cotton blend shows the HDC-BLO ribs clearly and holds the gathered shape. Follow the yarn label for care.
How much stuffing should I use?
Add polyester fiberfill until the pumpkin is full and rounded, but not so tight that the stitches stretch or the gathers reopen.