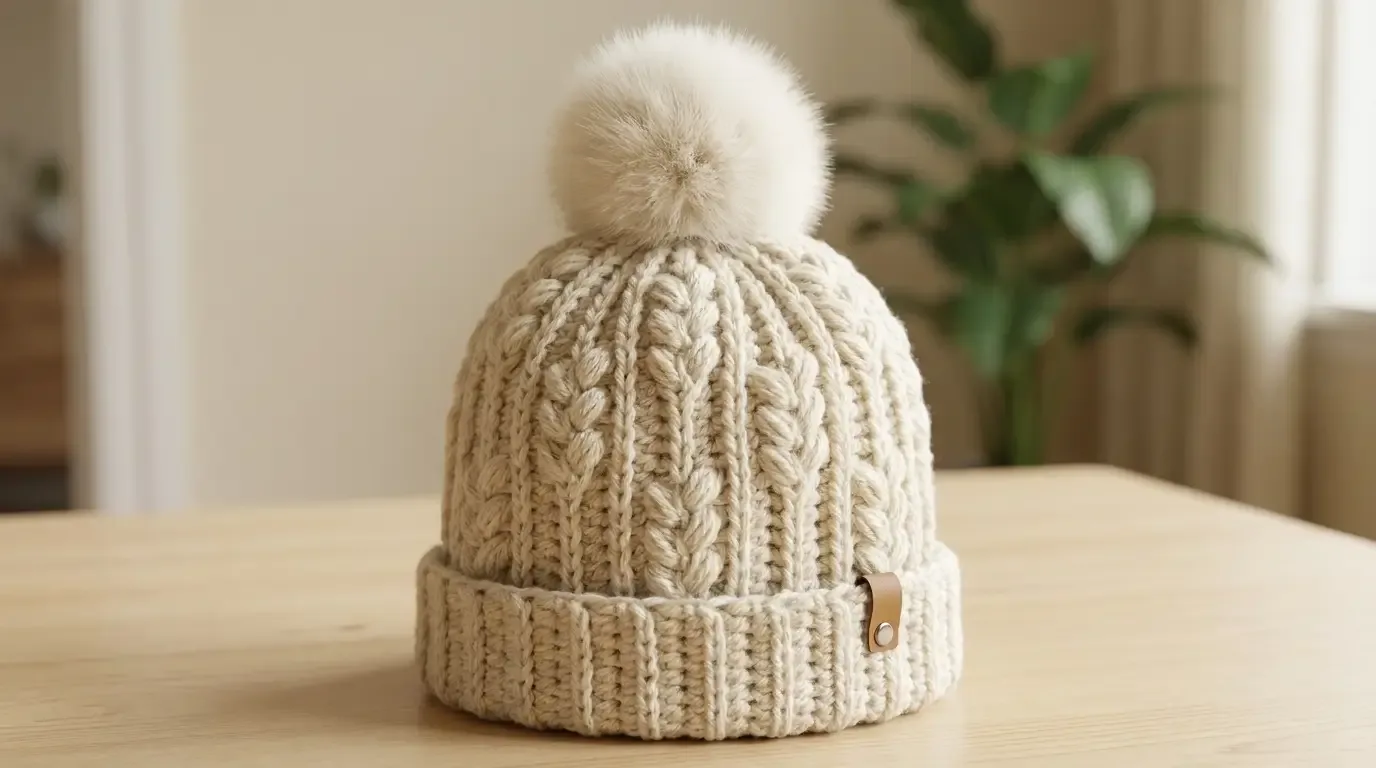
This original HookElla beanie is worked flat as one side-to-side panel. Compact three-leg clusters make the small raised grains, back-loop stitches form the narrow ridges and integrated cuff, and a simple seam and drawstring gather finish the hat.
About this pattern
The Ivory Grain-Ridge Beanie has a soft cream finish, slim raised lanes, small staggered grain-like clusters, a deep integrated folded cuff, and a gathered rounded crown. The entire hat begins as one rectangle: the foundation chain spans from cuff edge to crown, and each turned row adds a little more of the circumference. After the side seam and crown gather, the lower rib section folds up to form the cuff. A cream faux-fur pom-pom and a blank tan maker tag are optional finishing details.
The instructions below are an original HookElla construction using standard crochet stitches. The finished dimensions and yarn estimate are gauge-based planning figures; this pattern has not been physically sample-tested.
Materials
- About 200 yd (183 m) of smooth worsted / aran #4 yarn in ivory. Have at least 220 yd (201 m) available; the compact clusters can use more yarn than plain single crochet, and actual use varies with fiber and tension.
- US J-10 / 6 mm crochet hook, or the size needed to meet the target gauge.
- Tapestry needle, scissors, locking stitch marker, and tape measure.
- Optional: one cream faux-fur pom-pom with a sew-on loop or secure button backing; one small blank tan maker tag.
Choose a soft yarn with clear stitch definition. A smooth, plied yarn makes the little clusters easier to see and count. Check the yarn label before washing or steaming the finished hat.
Finished size and fit
One adult size is fully written. At target gauge, the relaxed circumference is approximately 21⅓ in (54 cm) and the folded depth is approximately 8⅝ in (22 cm). It is intended to stretch comfortably over an adult head measuring about 22–23½ in (56–60 cm) around.
The flat panel is approximately 21⅓ in wide × 10 2/7 in high (54 × 26 cm) before the cuff is folded. Its first 12 stitch positions make a 3 3/7 in (8.7 cm) ribbed section; folding that section in half gives a cuff about 1¾ in (4.4 cm) deep. The remaining 24 positions make the roughly 6⅞ in (17.4 cm) body. These are calculations from the target gauge, not measurements of a crocheted sample.
Gauge and sizing check
With the 6 mm hook, the target in this pattern fabric is 14 stitches across the chain direction and 9 rows along the panel direction = 4 in (10 cm) after the swatch has rested flat. The stitch gauge determines hat depth; the row gauge determines circumference. Also compare a short section of the 12-stitch HDC-BLO cuff with the same 14-stitch target, because ribbing may relax differently from the textured body.
For a useful body swatch, chain 21 and work 20 stitches (five four-stitch repeats) through at least three complete four-row cycles. Measure the center, away from the edges. Separately swatch 20 HDC-BLO stitches for at least 10 rows to check the ribbing. The stated gauges are targets, not measurements of a HookElla sample. If your gauge differs, change hook size and swatch again before committing to the full panel. Yarnivo’s crochet gauge calculator can translate measured swatch counts into gauge; it cannot verify stretch or guarantee this hat’s fit.
Abbreviations (US terms)
- BLO: back loop only
- ch: chain
- cl: compact grain cluster, defined below
- hdc: half double crochet
- rep: repeat
- RS / WS: right side / wrong side
- sc: single crochet
- st(s): stitch(es)
- yo: yarn over
The turning ch 1 does not count as a stitch. Turn after every row. Each row contains 36 actual stitches; never count the turning chain.
Special stitches and construction notes
Compact grain cluster (cl): In one stitch, work three partial HDC legs: yo, insert hook in the indicated stitch, yo and pull up a loop, yo and pull through two loops (two loops remain). Repeat that partial-HDC motion twice more in the same stitch, leaving four loops on the hook. Yo and pull through all four loops. The cluster uses one stitch and counts as one stitch; do not add a closing chain. Keep the pull-through snug, not tight, so the cluster stays compact.
HDC BLO: Work one HDC under the back loop only of the indicated stitch. This makes a narrow raised ridge. On the first row, work into the back bumps of the foundation chain; BLO begins on Row 2.
Panel orientation: The 36 chain-direction stitches run from the lower cuff edge toward the crown. Each turned row adds width around the head. Odd-numbered rows travel cuff-to-crown; even-numbered rows travel crown-to-cuff. Thus, even-row body instructions are written in reverse order. The panel remains flat until the short ends are seamed.
Complete crochet instructions
Foundation
With ivory yarn, ch 37. The first 36 chains are the working positions; the extra chain is the turning chain. The first 12 positions are the integrated cuff and the next 24 are the textured body. Place a marker after position 12 on Row 1 to help identify the cuff/body boundary. Row 1 is the WS; the clusters will face outward on the even-numbered RS rows.
- Row 1 (WS): Hdc in the back bump of each of the first 12 chains; sc in the back bump of each of the next 24 chains. Ch 1, turn. 36 sts. (12 cuff hdc, 24 body sc.)
Four-row texture cycle
The body has six four-stitch repeats: 24 body stitches ÷ 4 = 6 repeats. Each compact cluster replaces one stitch, so every body row still has 24 stitches. Rows 1–4 establish one cycle; Rows 5–8 repeat it on established stitches. Rows 9–48 repeat Rows 5–8 ten more times, making exactly 48 rows total.
- Row 2 (RS, grain offset A): Work from crown toward cuff. Repeat [sc in next 2 sts, cl in next st, sc in next st] 6 times across the 24 body stitches. Then hdc BLO in each of the last 12 cuff stitches. Ch 1, turn. 36 sts. (24 body, 12 cuff.)
- Row 3 (WS, ridge): Hdc BLO in each of the first 12 cuff stitches, then hdc BLO in each of the next 24 body stitches. Ch 1, turn. 36 sts. (12 cuff, 24 body.)
- Row 4 (RS, grain offset B): Work from crown toward cuff. Repeat [cl in next st, sc in next 3 sts] 6 times across the 24 body stitches. Then hdc BLO in each of the last 12 cuff stitches. Ch 1, turn. 36 sts. (24 body, 12 cuff.)
- Row 5 (WS, spacer): Hdc BLO in each of the first 12 cuff stitches, then sc in each of the next 24 body stitches. Ch 1, turn. 36 sts. (12 cuff, 24 body.)
- Row 6 (RS, grain offset A): Work from crown toward cuff. Repeat [sc in next 2 sts, cl in next st, sc in next st] 6 times across the 24 body stitches. Then hdc BLO in each of the last 12 cuff stitches. Ch 1, turn. 36 sts. (24 body, 12 cuff.)
- Row 7 (WS, ridge): Hdc BLO in each of the first 12 cuff stitches, then hdc BLO in each of the next 24 body stitches. Ch 1, turn. 36 sts. (12 cuff, 24 body.)
- Row 8 (RS, grain offset B): Work from crown toward cuff. Repeat [cl in next st, sc in next 3 sts] 6 times across the 24 body stitches. Then hdc BLO in each of the last 12 cuff stitches. Ch 1, turn. 36 sts. (24 body, 12 cuff.)
- Rows 9–48: Repeat Rows 5–8 10 more times. Keep the cuff at 12 HDC-BLO stitches and the body at 24 stitches in every row. Finish after Row 48, an offset-B cluster row. 36 sts in every row; 48 rows total.
To check the repeat arithmetic: each Row 2/6 body repeat consumes and produces four stitches (2 sc + 1 cluster + 1 sc); each Row 4/8 repeat consumes and produces four (1 cluster + 3 sc). Six repeats use all 24 body stitches and return 24 body stitches. Each row also has 12 cuff stitches, so the panel remains 36 stitches wide at every row. The twelve four-row cycles make 48 rows, including twelve offset-A and twelve offset-B cluster rows.
Construction-stage illustration
The image below is a visual summary of selected milestones; it does not replace the numbered row instructions above. The written pattern is the technical authority.
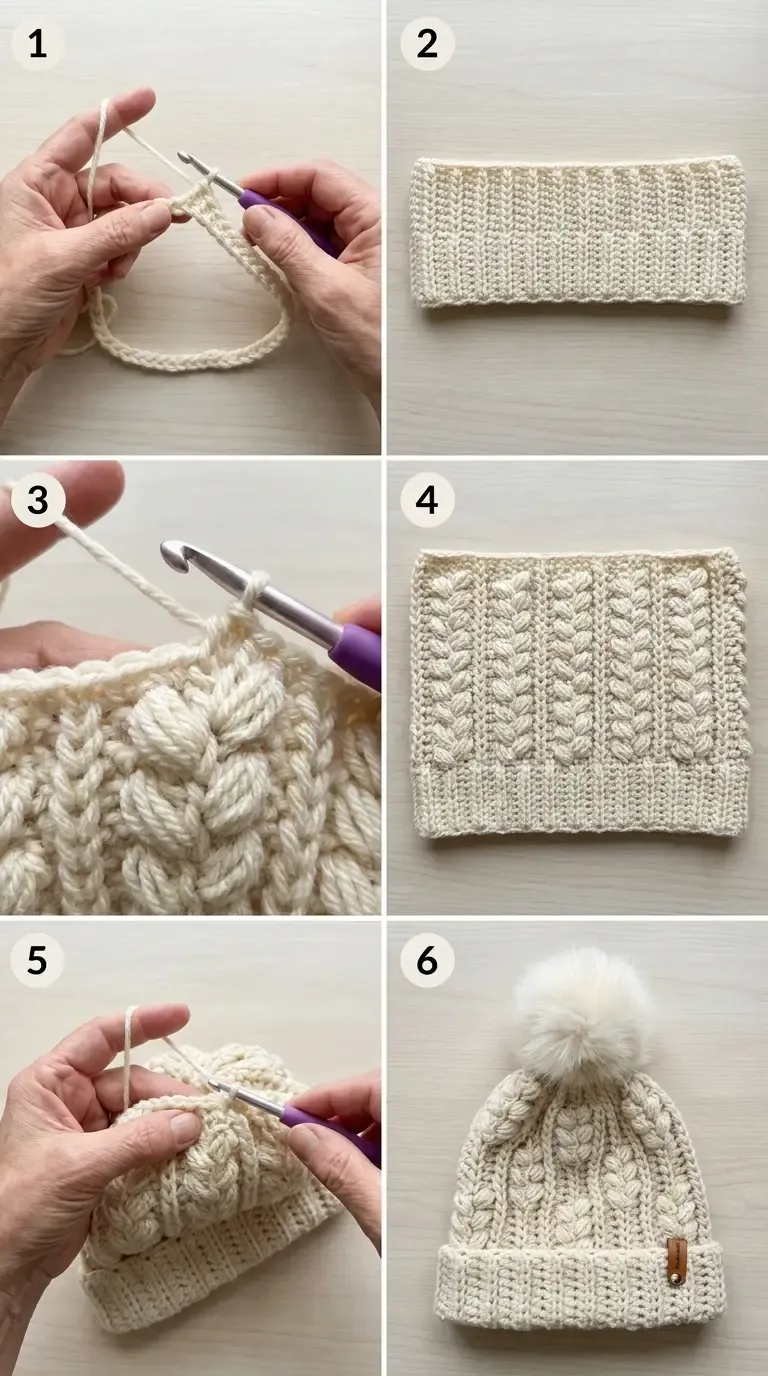
Assembly
- Lay the panel flat with the RS (cluster side) facing up. Bring Row 1 and Row 48 short ends together, keeping the cuff and body boundaries aligned. With a long yarn tail, mattress-stitch the matching 36 stitch positions together from cuff edge to crown edge. Do not twist the panel. This closes the short ends into a tube while preserving the 48-row circumference.
- At the crown, thread a long yarn tail through the two edge loops of each of the 48 row-end stitches along the top edge. Pull the tail gradually to gather the opening closed. Pass through the 48 loops a second time, draw snug, and make two secure tacking stitches across the small center opening. Knot on the inside and weave the tail through several crown stitches in different directions.
- For the integrated fold-up cuff, fold the 12-stitch ribbed section in half toward the outside. Bring the lower chain-start side of each row to the inside of the cuff/body boundary after stitch 12. Match the corresponding row positions all the way around, then tack and sew the edge evenly to that boundary. Do not attach the cuff to the foundation-chain edge—the foundation chain is part of the short side seam. Keep the folded edge even and stretchy; do not sew through the visible front.
Finishing and care
- If using a faux-fur pom-pom, sew its loop or backing securely over the gathered crown. For a removable pom-pom, attach it with a button sewn inside the crown and check that no hard edge rubs the wearer.
- If desired, sew one small blank tan maker tag to the front of the cuff. Keep the tag away from the side seam and avoid a sharp or exposed fastener.
- Weave in all ends on the inside, splitting several stitches so they do not work loose. Gently shape the hat without flattening the raised clusters.
- Follow the yarn label for washing and drying. Air-dry flat when possible; avoid high heat on acrylic yarn and faux fur.
Fit adjustments and troubleshooting
- For a different adult circumference: Work a whole number of four-row cycles so the texture meets at the seam. At target row gauge, one four-row cycle changes circumference by about 1¾ in (4.4 cm). Measure the recipient’s head and aim for roughly ½–1½ in (1.3–3.8 cm) of negative ease, then choose the nearest multiple of four rows. A different row count changes fit; it does not change the 36-stitch panel height.
- For a taller or shorter body: Keep the 12 cuff stitches. Add or remove one complete four-stitch body repeat by changing the foundation chain by four chains (the written adult size is 12 cuff + 24 body + 1 turning chain = 37 chains). Recheck the texture counts and finished depth; the cuff fold remains the same.
- The panel is wider or narrower than expected: Check row gauge, because rows determine circumference. The written 48 rows project to 21⅓ in at 9 rows per 4 in. Adjust the hook and swatch again rather than stretching the finished seam to compensate.
- The hat feels too shallow or too deep: Check the 14-stitch gauge along the chain direction and verify that the 12 cuff stitches were included in the foundation. The folded cuff is half of that 12-stitch section; the other 24 stitches form the body.
- Clusters look bulky or loose: Keep the three partial-HDC legs short and the final pull-through snug. If the fabric is too dense, try a larger hook; if the clusters lose definition, try a smaller hook or a smoother yarn, then recheck both gauge directions.
- The crown gathers into a point: Distribute the drawstring evenly over all 48 row ends, tighten in small increments, and make the second reinforcing pass before knotting.
More cozy makes are in HookElla’s Wearables & Accessories crochet patterns.
Frequently asked questions
Is this a copy of another beanie pattern?
No. This is an independently written HookElla pattern using its own stitch counts and cluster sequence. The reference designer’s instructions are not reproduced here.
Can I use a different yarn weight?
Use worsted / aran #4 for the stated size and target gauge. A different yarn weight changes the fabric, drape, and dimensions; make a new swatch and do not assume the same 36 stitches and 48 rows will fit.
Is the pom-pom required?
No. The hat is complete without it. The pom-pom and blank tan maker tag are optional finishing details.
Has this exact pattern been physically tested?
No physical sample has been crocheted for this article. The stitch arithmetic, repeat totals, and target-gauge dimensions have been reviewed, but yarn use, actual gauge, stretch, and final fit still need confirmation with your own swatch.
Inspiration credit
This is an independently written HookElla pattern inspired by the broad ivory, ribbed-brim, raised-grain beanie style. It does not reproduce Tidzhen Gyuldzhu’s stitch directions or pattern. Wheat Harvest Beanie by Tidzhen Gyuldzhu / Passionate Crafter.