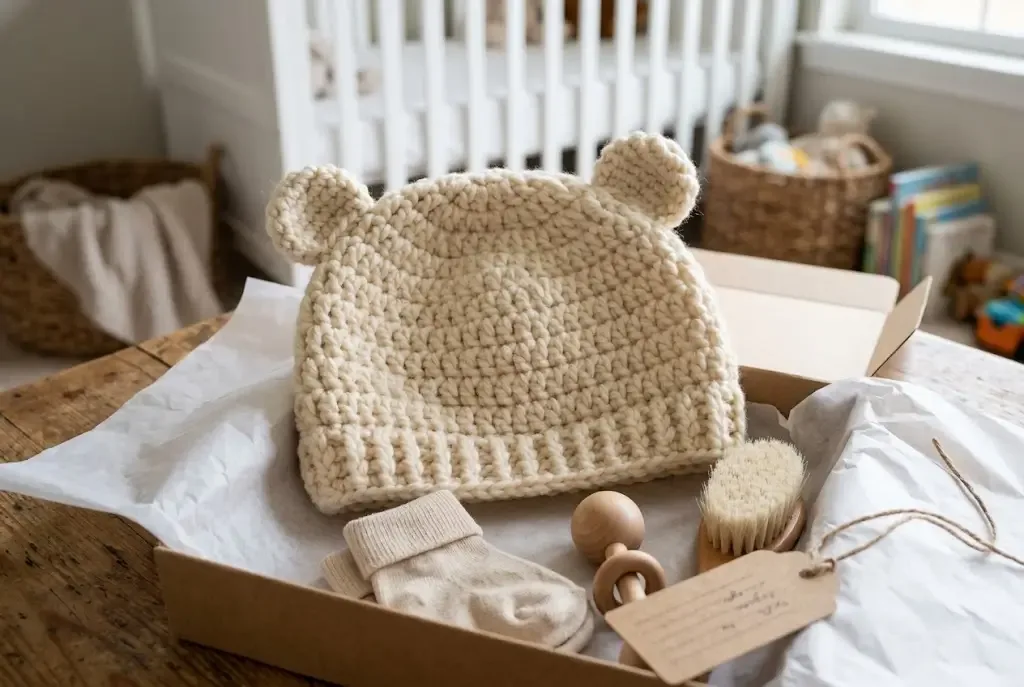
Tiny rounded ears turn a practical cream baby hat into a charming handmade keepsake. Worked in plush yarn with a simple crown and clean folded-looking edge, this teddy-inspired design is quick enough for a last-minute shower gift yet sweet enough to stand out in a carefully packed gift box.
Meet the teddy-ear baby hat
This teddy-ear baby hat is based on the beginner-friendly Crochet Baby Hat in Four Sizes from Crochet Dreamz. The original project uses a basic top-down hat, two separately crocheted ears, and super bulky yarn to create a quick baby-shower gift or photo prop.
This HookElla article is an original editorial showcase, not a substitute for that pattern. We do not reproduce Crochet Dreamz’s round counts, stitch-by-stitch ear instructions, photographs, or paid material. Use the linked source for the complete authorized pattern and sizing directions.
The HookElla visual version focuses on the 3–6 month size in warm vanilla cream: approximately 15 in (38 cm) in circumference × 6 in (15 cm) high, with no face, embroidery, or extra decoration. Two small rounded ears provide all the character the hat needs.
Why quick baby hats make useful handmade gifts
A small hat is an inviting gift project when a blanket or full outfit will not fit the schedule. It uses little yarn, works up quickly in a super bulky weight, and can be paired with practical store-bought basics. The finished piece still feels personal because the maker chooses the color, softness, and placement of every detail.
The simple teddy silhouette also works for many nursery palettes. Without a stitched face or loose embellishments, the cream hat remains understated enough for everyday photographs and family visits. It can be presented as the handmade centerpiece of a small shower box rather than competing with the rest of the gift.
Source materials and size range
Crochet Dreamz recommends super bulky #6 yarn, including Bernat Baby Blanket or another yarn that matches the pattern gauge, with a 10 mm (N/P) crochet hook. The estimated yardage is approximately 30–45 yd (27–41 m), depending on size. You will also need a tapestry needle, scissors, and a removable stitch marker.
The source includes four sizes:
- Newborn: about 13 in around × 5 in high
- 0–3 months: about 14 in around × 5½ in high
- 3–6 months: about 15 in around × 6 in high
- 6–12 months: about 17 in around × 6½ in high
Age labels are planning guides, not universal fit guarantees. Compare the measurements with a hat that fits the intended baby, account for the yarn’s stretch, and check the Crochet Dreamz gauge before choosing a size.
Choosing soft, baby-friendly yarn
The yarn creates most of this design’s personality, so choose it with care. A warm vanilla or natural cream shows the single-crochet texture, photographs softly, and coordinates with nearly any baby outfit. Look for a smooth super bulky yarn that bends comfortably instead of forming a rigid bowl.
- Rub a washed swatch against the inside of your wrist to check softness.
- Choose a washable fiber and follow the exact care instructions on its label.
- Avoid long, loose fibers that shed or hide the stitch structure.
- Check that the yarn recovers after stretching rather than remaining baggy.
- Keep all yarn from one dye lot so the crown, ears, and finishing round match.
- Skip beads, buttons, long cords, and other detachable decoration.
If you substitute a different #6 yarn, match the source gauge rather than assuming all super bulky yarns behave alike. Chenille, wool blends, and thick plied acrylic can produce very different density and stretch on the same hook.
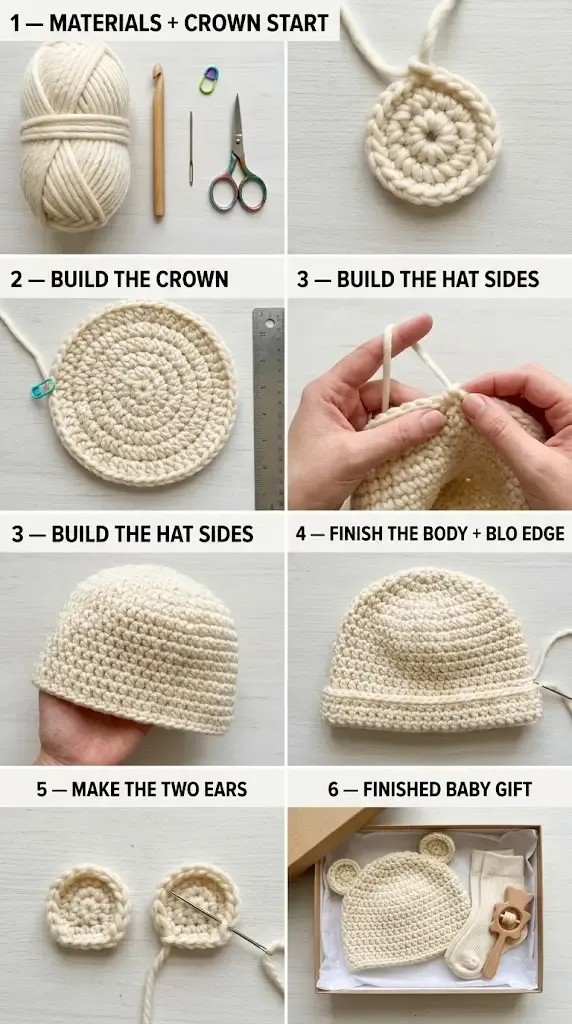
This HookElla image is a visual construction reference, not a stitch chart. Follow Crochet Dreamz for the complete size-specific instructions.
Crown construction at a glance
The hat begins at the center of the crown and expands outward in rounds. Regular increases turn the small starting circle into a flat disc sized for the chosen age range. Once the disc reaches the required diameter and stitch count, the shaping pauses and the same number of stitches continues down the sides.
The source offers a start with or without a magic ring. Whichever method you select, the center tail needs to be woven back through the dense fabric in several directions so the crown opening remains closed. Before building the sides, lay the crown flat: it should not cup sharply or ripple.
Working the hat body
The main fabric is worked primarily in single crochet. After the crown increases are complete, the rounds continue without shaping, turning the flat circle into a softly rounded hat. Super bulky yarn makes each round easy to see and gives the finished fabric its plush appearance.
Keep a relaxed grip. Tight single crochet can make a baby hat stiff and can reduce the finished circumference considerably. Stop periodically to measure the actual circumference and height without stretching, then compare those figures with the source size chart.
Why the stitch marker matters
The body is worked continuously, so there is no obvious seam identifying where one round ends. Place a removable marker in the first stitch of the round and move it upward every time you reach it. This small habit prevents accidental extra stitches and makes it much easier to count completed rounds.
Check the marker before increasing or ending a size section. In thick, fuzzy yarn, the first stitch can disappear visually beneath the working loop, so relying on memory is risky.
The BLO finishing edge
The final round is worked through the back loop only (BLO). Inserting the hook under only the back half of each stitch leaves the front loop visible as a narrow horizontal ridge. That ridge gives the lower edge a clean, lightly folded appearance while keeping the design simple.
Keep the finishing round as relaxed as the hat body. A tight BLO round can pull in the opening even when the crown and sides measure correctly. Lay the hat flat after fastening off and make sure the edge does not flare, twist, or draw inward.
Making the rounded teddy ears
The two ears are separate small pieces shaped into shallow semicircles. Their compact scale is important: oversized ears can make the hat feel costume-like, while small rounded ears keep the look gentle and teddy-inspired.
Make both ears in the same sitting if possible so your hand tension stays consistent. Set them side by side before assembly and compare their height, width, row direction, and tail placement. If one is visibly larger, remake it now rather than trying to hide the difference during sewing.
Cinching the ear bases
The source shapes each ear by running its long sewing tail in and out along the straight lower edge, then pulling gently. This gathering cups the ear and narrows its base. Pull both ears by the same amount; stronger gathering produces a smaller, rounder ear, while light gathering leaves a broader shape.
Secure the gather without cutting the tail. That same long strand is useful for sewing the ear to the hat and avoids introducing an additional knot.
Symmetrical ear placement
Fold the completed hat flat in the direction where it naturally settles. Position one ear near each upper side and use removable markers to hold them temporarily. Measure from the crown center to each ear base and from each ear to the folded side edge.
Step back and view the hat upright before sewing. The ears should sit at the same height and tilt outward by the same amount. Sew through the full base of each ear and the hat fabric with several small passes, spreading the attachment over multiple stitches so there is no single strain point.
After the first ear is secure, place the second again instead of assuming its original marker position is still correct. Compare from the front, back, and top, then complete the second seam.
Secure finishing and care
Weave every tail deeply into the wrong side of the dense single-crochet fabric, reverse direction, and pass through a different path before trimming. Pay particular attention to the crown center and ear bases. Gently stretch each attachment after weaving to confirm that no tail begins to emerge.
Wash the completed hat according to the yarn label before gifting if that agrees with the family’s preferences. Reshape it while damp and let it dry completely. Recheck the measurement after washing, since plush yarn can relax or compact. Include the fiber content and exact washing directions on a small care card.
Baby-shower presentation ideas
Nest the vanilla hat in a kraft gift box lined with white tissue. Add cream cotton socks, a plain bodysuit, or soft leggings in the same age range. A wooden baby brush or simple rattle can complete the neutral presentation, provided it is packaged according to its own maker’s age and care guidance.
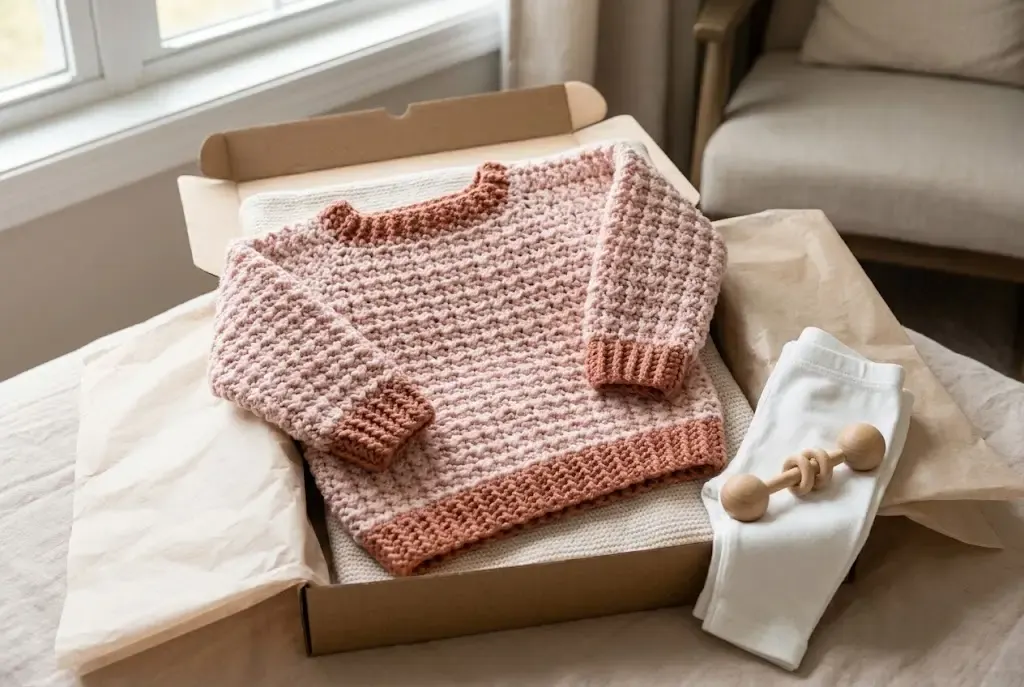
For a larger handmade set, pair the hat with HookElla’s Crochet Even Moss Baby Sweater showcase or the Cream Basketweave Crochet Baby Blanket. For another simple hat construction, explore the Easy Ribbed Crochet Beanie, and browse the Baby Crochet collection for more gift inspiration.
Attach a tag that lists the hat size, yarn fiber, and care instructions. Credit Crochet Dreamz as the pattern source if you are sharing the finished project online, and direct other crocheters to the original pattern rather than copying its instructions.
A small gift with plenty of charm
This teddy-ear hat shows how a modest amount of yarn and two well-placed details can make a memorable baby gift. Keep the vanilla palette soft, measure the 3–6 month size carefully, sew the ears securely, and let the uncomplicated shape remain the star.
Helpful questions
Does HookElla reproduce the complete Crochet Dreamz baby-hat pattern?
No. This is an independent gift-inspiration showcase. Visit the linked Crochet Dreamz page for the complete round counts, size instructions, ear directions, and pattern support.
What size is the warm vanilla hat shown here?
The HookElla visual version represents the 3–6 month size, approximately 15 inches in circumference and 6 inches high. Always compare finished measurements with the intended baby rather than relying only on an age label.
How much yarn does this baby hat require?
Crochet Dreamz estimates approximately 30–45 yards of super bulky
What hook size does the source recommend?
The original pattern recommends a 10 mm N/P hook with super bulky yarn. Use the hook that gives the source gauge and a soft, flexible fabric.
Are the teddy ears crocheted as part of the hat?
No. Two small rounded ears are made separately, cinched across their straight bases, positioned symmetrically, and sewn securely to the finished hat.
Why is the last round worked through the back loop only?
Leaving the front loops visible creates a subtle horizontal ridge near the lower edge. It gives the simple single-crochet body a neat visual finish without adding a separate brim.
What makes a yarn suitable for this baby gift?
Choose a smooth, soft, washable yarn that keeps its shape after laundering and does not shed long fibers. Follow its care label and sew every tail and ear attachment securely.